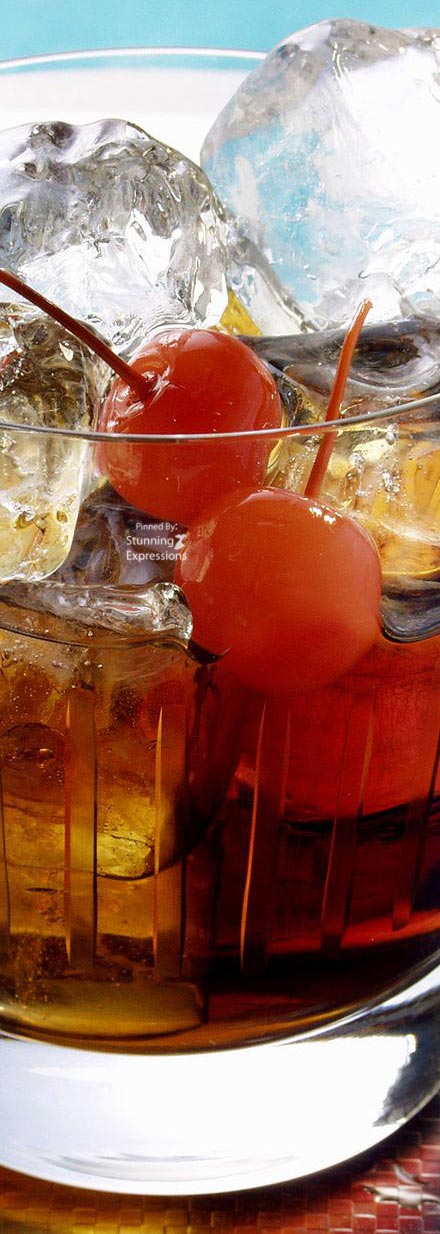
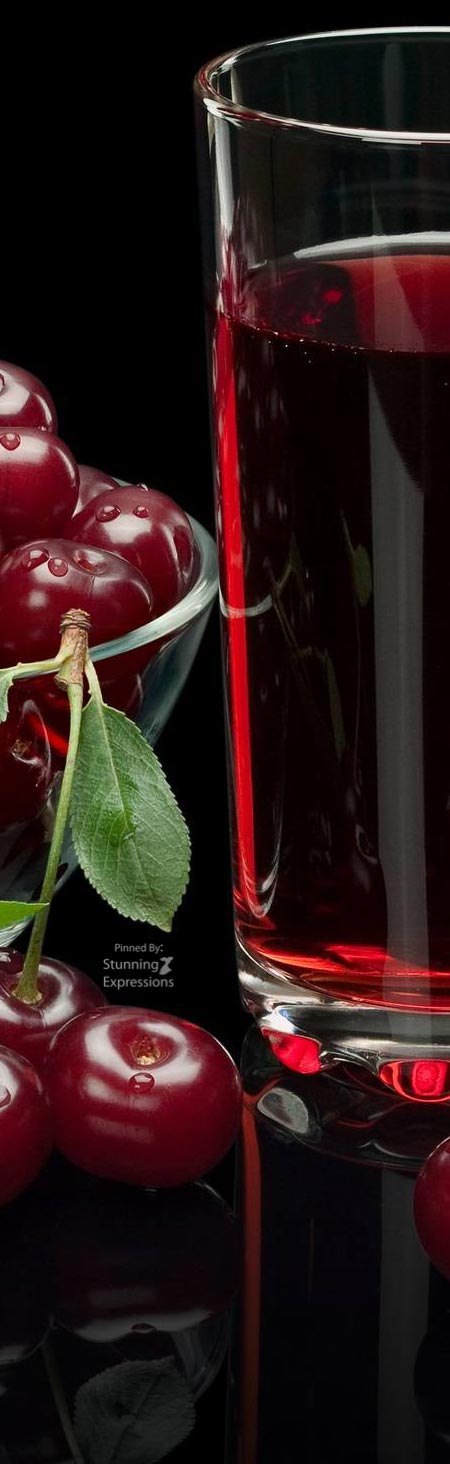
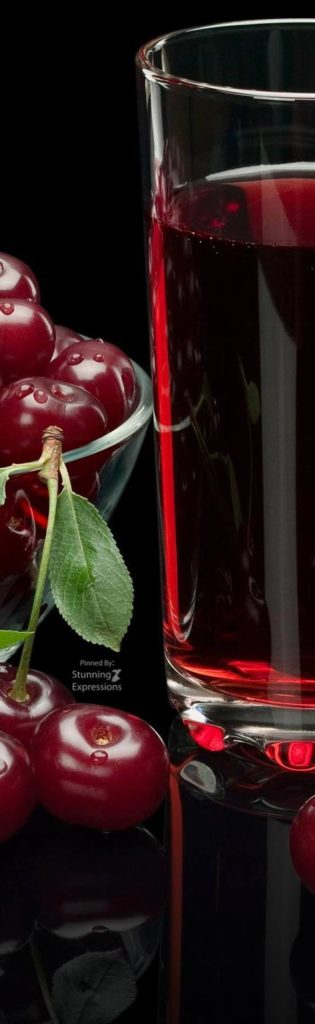
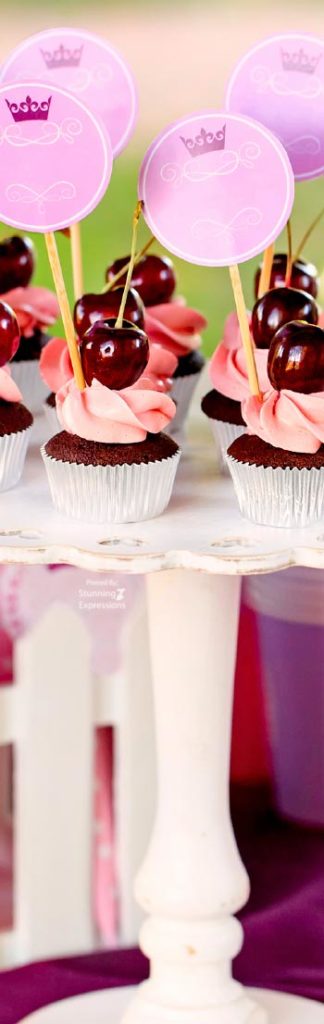
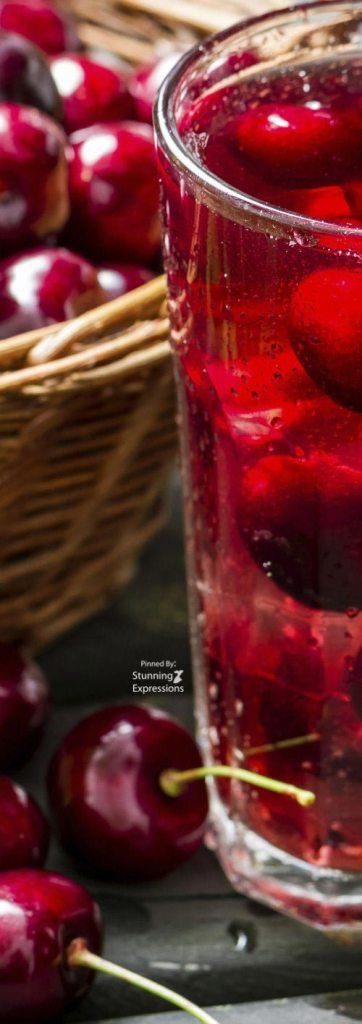
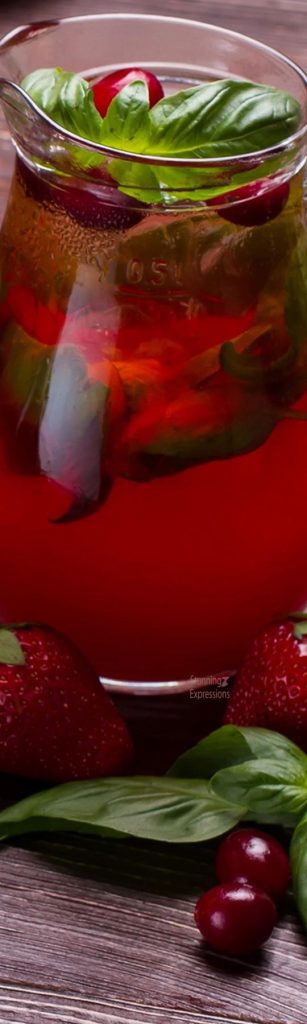
Cocktail Recipe You Can Easily Make at Home. Marie Claire
1-1/2 parts GREY GOOSE
3-1/2 parts Cola
1/2 part Grenadine
Fill glass slightly above rim with cubed ice. Pour ingredients in order listed to 1/2 inch from top of glass and stir. Add soda straw and garnish with a cherry.
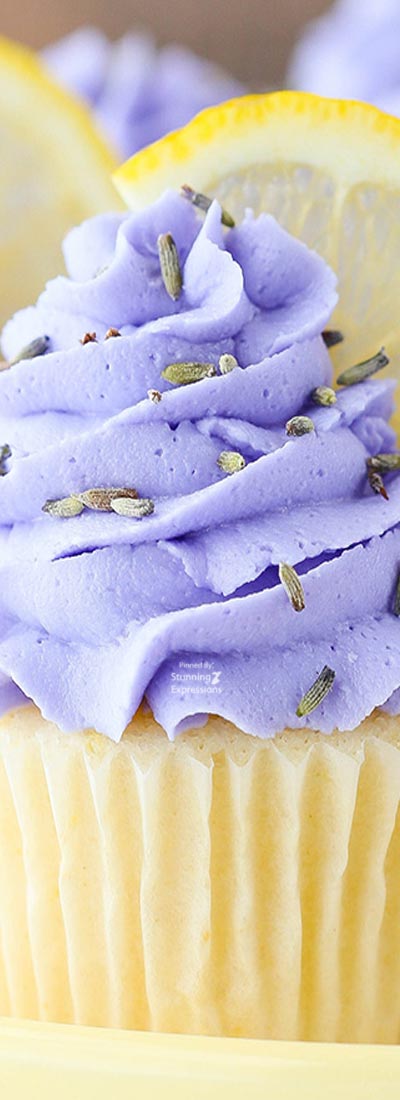
Easy lemon cupcakes with lavender buttercream frosting, topped with lavender flowers and fresh lemon slices. The Cake Blog
For the Lemon Cupcakes:
6 tbsp unsalted butter, room temperature
3/4 cup sugar
6 tbsp sour cream
1/2 tsp vanilla extract
1 tbsp grated lemon zest
3 large egg whites, room temperature
1 1/4 cups all-purpose flour
2 tsp baking powder
1/4 tsp salt
1/4 cup milk
1 tbsp water
3 tbsp fresh lemon juice (1-2 lemons)
For the Lavender Frosting:
1/2 cup salted butter
1/2 cup shortening
4 cups powdered sugar
2-3 tbsp water or milk
1/2 tsp vanilla
1 1/4 tsp lavender extract
Violet gel paste color, optional
Lavender flowers
6-7 Lemon slices, cut in half
To make the cupcakes, preheat the oven to 350°F (176°C) and prepare a cupcake pan with cupcake liners.
In a large mixing bowl, cream the butter and sugar together until light in color and fluffy, about 3-4 minutes.
Add the sour cream, vanilla extract and lemon zest and mix until well combined.
Add the egg whites in two batches, mixing until well combined after each. Scrape down the sides of the bowl as needed to be sure all ingredients are well incorporated.
Combine the dry ingredients in another bowl, then combine milk, water and lemon juice in a measuring cup.
Add half of the dry ingredients to the batter and mix until well combined.
Add the milk mixture and mix until well combined.
Add remaining dry ingredients and mix until well combined. Scrape down the sides of the bowl as needed to be sure all ingredients are well incorporated.
Fill cupcake liners about ¾ full. Bake for 15-17 minutes, or until a toothpick inserted comes out with a few crumbs.
Remove cupcakes from oven and allow to cool for 2-3 minutes, then remove to cooling rack to finish cooling.
While the cupcakes are cooling, make the frosting. Beat the butter and shortening together until smooth.
Add about half of the powdered sugar and mix until smooth.
Add about 2 tablespoons of water or milk and the extracts and mix until smooth.
Add the remaining powdered sugar and mix until smooth. Add additional water or milk, if needed.
Add violet icing color to the frosting until it reaches the desired shade of purple.
Pipe the frosting on top of the cupcakes using a closed star piping tip like this one. Top the cupcakes with a sprinkle of lavender and half a slice of lemon.
To make the frosting all butter, replace the 1/2 cup shortening with an additional 1/2 cup salted butter
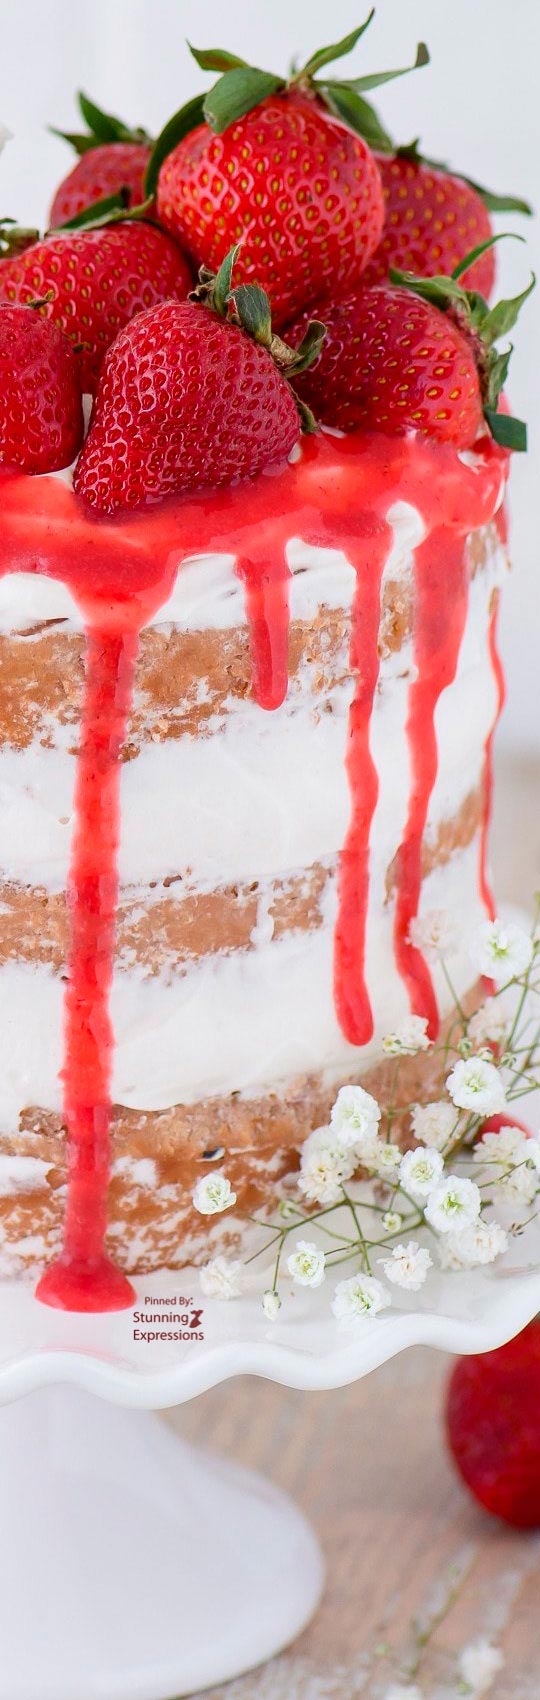
This strawberry naked cake is made with fresh pureed strawberries and is paired with homemade sweet cream whipped cream! Like a strawberries and cream cake! The First Year Blog
For the Strawberry Cake
2 cups all purpose flour
1 tsp baking powder
1/2 tsp baking soda
1/4 tsp salt
1-1/4 cup sugar
1 stick butter, softened
2 eggs
2/3 cups pureed strawberries
1 cup strawberry yogurt
1/4 cup Sweet Cream International Delight creamer
For Whipped Cream
1-1/2 cups heavy cream
1/2 cup Sweet Cream International Delight creamer
1/2 cup powdered sugar
2 tsp vanilla
8 tsp water, cold
2 tsp gelatin
Strawberry Cake
Preheat the oven to 350º F
In a smaller bowl, combine the flour, baking powder, baking soda, and salt. Mix gently. Set aside.
In a larger mixing bowl, beat the sugar and butter with an electric mixer until fluffy, 1-2 minutes.
Add in the eggs, lightly beat with the mixer.
Add in the pureed strawberries, mix with a spatula.
In a separate bowl combine the yogurt and sweet cream creamer, mix with a spoon until you have watered down yogurt.
Add this to the cake mixture, and mix with a spatula to combine.
Gradually add in the flour mixture, mixing with a spatula until the flour is just incorporated.
Using butter grease the bottom and sides of three 6 inch round cake pans or springform pans (you could also use two or three 8 inch round pans) and line the bottoms with a round piece of parchment paper. To ensure even baking, place a bake even strip around each pan. You can make your own homemade bake even strip by cutting a towel or shirt to fit the size of your pan. Get the fabric really wet, then squeeze out the dripping water but do not squeeze it too dry. Secure the fabric around the pan with a safety pin.
Divide the batter among the pans, if using three 6 inch pans, about 1 & 1/2 cups of batter will go in each pan.
Bake for 36-42 minutes or until a toothpick inserted in the center comes out with minimal crumbs.
Once the cake is done baking, allow it to cool in the pan on a cooling rack for 10 minutes. After 10 minutes, carefully remove the cake from the pan. If using a springform pan, remove the sides and bottom. Allow the cake to cool completely on a cooling rack. Once cool, remove the parchment paper round from the bottom of the cake. If you need to level the top of your cake, do so now using either a cake lever or knife.
If you’ll be assembling the cake later, wrap the cake layers really well in plastic wrap and place them in the refrigerator, they are good for up to one week like this.
Whipped Cream
Be sure to place metal mixing bowl and beaters in freezer for 30 minutes before making the whipped cream.
In small bowl, combine the 8 tsp of cold water with the 2 tsp of gelatin. Set aside and allow the gelatin to bloom.
Remove the mixing bowl and beaters from the freezer.
Add the heavy cream, sweet cream creamer, powdered sugar, and vanilla to the chilled bowl.
Beat the mixture into soft peaks using an electric mixer. Could take 5+ minutes.
Microwave the gelatin and water for 10 seconds, the mixture will now be liquid-y. Slowly add the gelatin to the whipped cream.
Beat the mixture until stiff peaks form. Could take 4+ minutes.
To assemble the cake
Spread a small amount of whipped cream on a 6 inch round cardboard cake circle. Place your first layer of cake on top of the cardboard.
Fill a piping bag fit with a large round piping tip with a good amount of whipped cream.
Pipe a generous amount of whipped cream on top of the first layer, covering the entire layer.
Repeat this processor each layer of cake. Once all of the layers and stacked, pipe a generous amount of whipped cream on top of the cake.
Next, use a small offset spatula to add a thin layer of whipped cream to the sides of the cake.
Don’t completely cover the cake layers as they are suppose to still be visible.
You can refrigerate the assembled cake for up to 3-5 hours loosely covered or serve immediately. Keeping the cake in the fridge for a longer amount of time is not recommended as the whipped cream will not hold up the best.
If desired before serving, decorate the cake with flowers, fresh strawberries and strawberry puree drizzle.
1 PLACE METAL MIXING BOWL AND BEATERS IN FREEZER AT LEAST 30 MINUTES BEFORE MAKING WHIPPED CREAM
2- Because the cake is frosted with a whipped cream, some of the whipped cream may come out of the sides of the cake when cutting. If you’d prefer to pair this cake with a buttercream frosting, I’d recommend a vanilla buttercream.
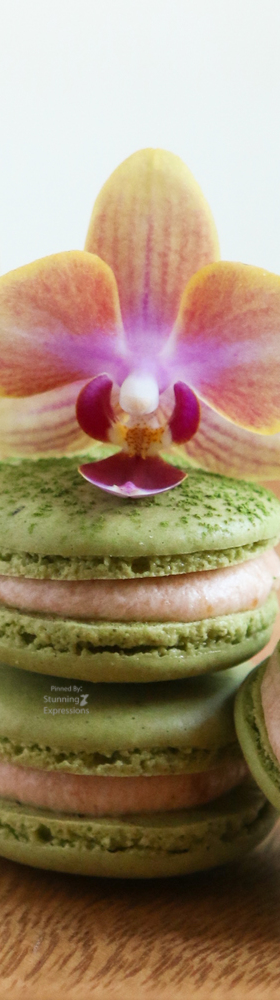
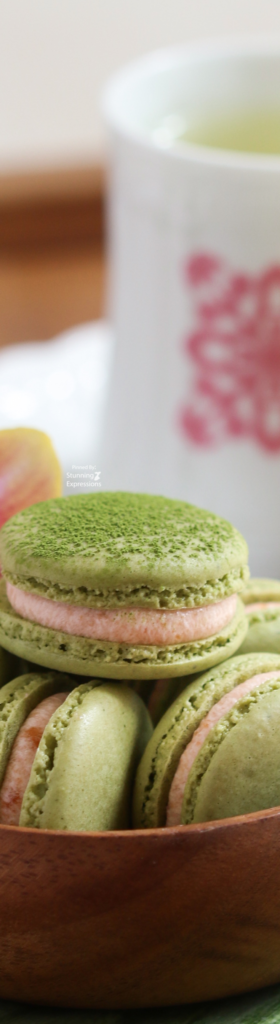
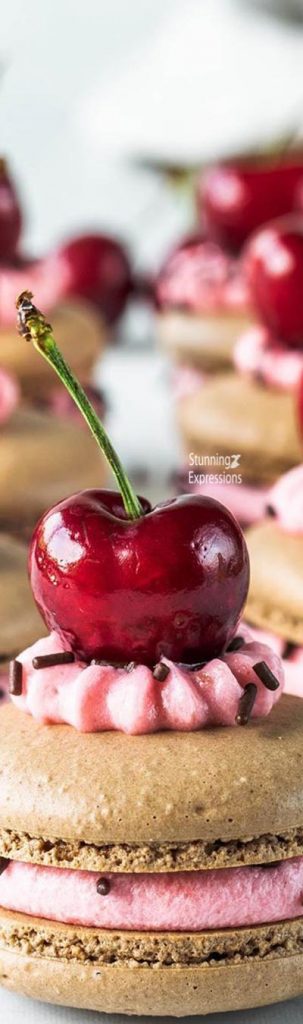
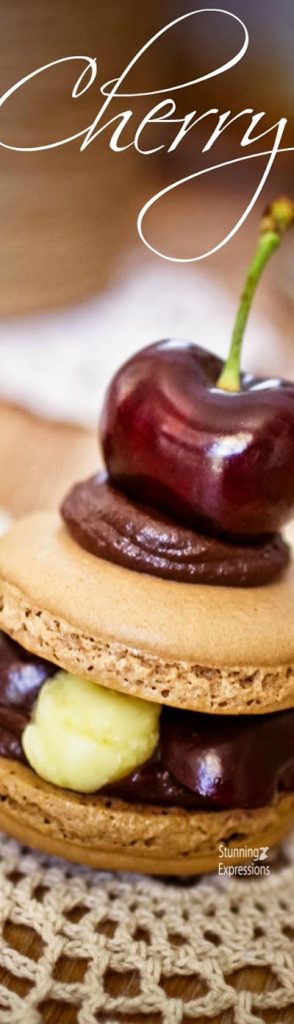
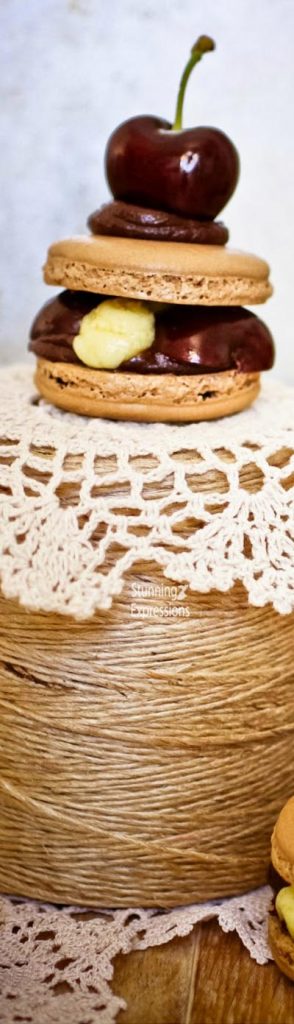
Green Tea Macarons with Guava Buttercream (based on the Italian Meringue Method) – Thirsty For Tea
Matcha Green Tea French Macarons (based on the Italian Meringue Method)
85 grams egg whites (from about 3 eggs), separated in two bowls (one with 60 grams, the other with 25 grams)
1 tsp meringue powder
pinch of cream of tartar
90 grams granulated sugar
35 ml water
100 grams confectioners’ sugar
100 grams ground almonds
2 teaspoons Matcha powder
Vegan Guava Buttercream
1/4 cup nonhydrogenated shortening (I used Spectrum Organic All Vegetable Shortening)
1/4 cup trans-fat free margarine @ room temperature (I used Earth Balance Vegan Buttery Sticks)
1 1/4 cup cup confectioners’ sugar
100 grams grams guava paste
1/4 cup lemon juice
2 tbsp water
2-3 tbsp cornstarch, or more for a stiffer frosting
Matcha Green Tea French Macarons Shells (based on the Italian Meringue Method)
In a food processor, process almond flour, confectioner’s sugar, and matcha tea powder. Process to a fine powder, then either sift or just use your fingertips to break up any remaining clumps. For the most smooth looking macaron shells, sift this mixture twice before proceeding to next step. When the powder is light and clump-free, it is ready to use.
Place granulated sugar and water in a saucepan. Use your index finger to gently swirl the sugar and water together evenly, being careful not to allow the sugar crystals to set on the sides of the saucepan. Clip a candy thermometer to the side of the saucepan into the sugar-water mixture. Set the saucepan on medium heat without stirring. You can use a pastry brush dampened with water to brush against the sides of the pan if you see any sugar crystals forming. The target temperature is 240 degrees F.
Meanwhile, add 60 grams of egg whites, meringue powder, and cream of tartar to bowl of mixer fitted with a wire whisk attachment. Start to mix egg whites at medium speed until you reach a frothy “bubble bath” like stage. When you have reached this stage, lower the mixer speed to low and check on the boiling sugar syrup mixture.
When the syrup reaches 240 degrees F, take the saucepan off the heat and slowly pour the syrup into the mixer in a thin stream, mixing at medium speed. Be careful not to pour the syrup on the beaters, as this will cause the syrup to splatter against the sides of the mixing bowl. After all the syrup is added, raise the speed to medium/high and continue to beat until you get a “bird’s beak” consistency, then stop the mixer. This should take 5-7 minutes. The meringue will be cooler in temperature after this stage.
Make a meringue paste by mixing the remaining 25 grams of egg whites with the almond-sugar-matcha mixture. Mix until completely incorporated. Gently add and fold in the cooled, fluffy meringue in two additions.
Continue folding with a “J stroke” hand/spatula movement until the mixture is homogeneous.
Add batter to a large piping bag fitted with an Aetco 806 tip (1/2″ opening).
Pipe out macarons on parchment paper with a macaron template placed under the parchment. This will ensure equal piping/same shell size.
After piping a full pans, lift each pan a few inches off the counter-top and slam down, making sure to hold parchment in place with your thumbs during each slam. Repeat this action a total of three times for each of the two pans.
Let piped macarons dry for 30 minutes or up to an hour at room temperature. During this time, pre-heat oven to 280 degrees F and make filling.
Place baking sheets of macarons in the oven after the macarons pass the “petting without sticking” test. That is, you should be able to “pet” the macaron with your fingertip without any residual stickiness or batter resulting on your finger. Once the piped macarons have passed this test, they are ready for the oven.
Bake macarons for 13-15 minutes, or until you can gently press on their tops without getting any yielding. Be careful to not over bake or over brown.
Remove pans from oven and let macarons sit out to cool completely. If you have difficulty removing them from parchment after fully cooled, sprinkle some water under the parchment for easier release.
Pair macaron shells based on size and shape, fill with Vegan Guava Buttercream, and sandwich. Voila! Makes about 35 sandwiched 1.5″ macarons. Recipe is easily halved using a hand-held mixer instead of a stand mixer.
Vegan Guava Buttercream
Cut up the guava paste into 1/2″ cubes and place in a small saucepan. Add water and 2 Tbsp of lemon juice into the pot and cook on medium/low heat until all the cubes softened, this should take about 10 minutes. The result is a soft, thick fruit jam, with no remaining lumps of paste. Place the jam mixture in a bowl and set aside to cool completely to room temperature.
Cream shortening and margarine together to a fluffy consistency.
Gradually add confectioner’s sugar to the creamed mixture. The mixture will look crumbly at this point. Add and mix in the remaining 2 Tbsp lemon juice.
Mix in 2-3 Tablespoons of the completely cooled guava paste jam.
Gradually add cornstarch, one tablespoon at a time until desired consistency is achieved. Makes enough to frost 12 regular cupcakes or fill 45 small sandwich cookies.
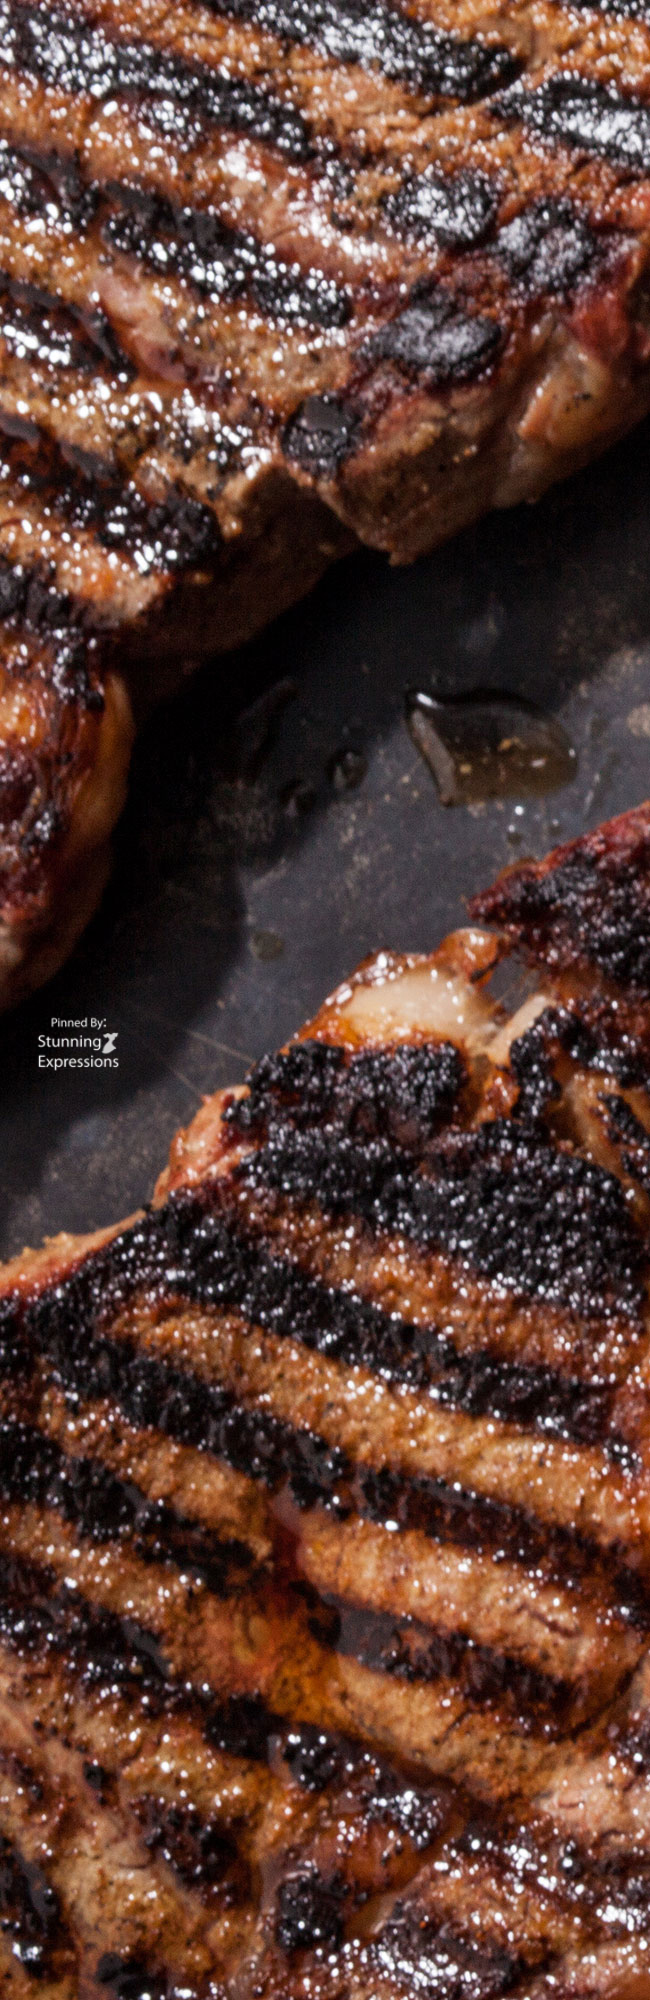
These grilled steaks get another layer of flavor from a simple spice rub. Mix together garlic and mustard powder with salt and pepper, coat the rib steaks. Chowhound
2 teaspoons ground mustard
2 teaspoons garlic powder
2 teaspoons kosher salt
1 1/2 teaspoons freshly ground black pepper
1 lbs rib steaks, at least 1 inch thick (2 to 3 pounds total)
1-Combine the mustard, garlic, salt, and pepper in a small bowl. Coat both sides of the steaks with a thin layer of the spice mixture, rubbing it in thoroughly. Let them sit at room temperature for 1 hour. (The rub should be almost completely absorbed by the meat, or it will burn when the steaks are grilled.) Meanwhile, make the salad.
To grill the steaks: Vegetable oil, for coating the grill grates
1-Heat a gas or charcoal grill to high (about 450°F to 550°F).
2-When the grill is ready, rub the grates with a towel dipped in vegetable oil, place the steaks on the grates, and close the grill. Cook, undisturbed, until grill marks appear on the bottom and the steaks are lightly charred on the edges, about 4 to 5 minutes. Flip, close the grill, and cook until the steaks reach medium rare, about 4 minutes more. (To check for doneness, use your finger to press on the meat: It should be firm around the edges but still give in the center. You can also use an instant-read thermometer; it should register 115°F to 120°F for rare, 125°F to 130°F for medium rare.)
3-Transfer the steaks to a cutting board and let them rest for at least 5 to 10 minutes. Serve with the salad.
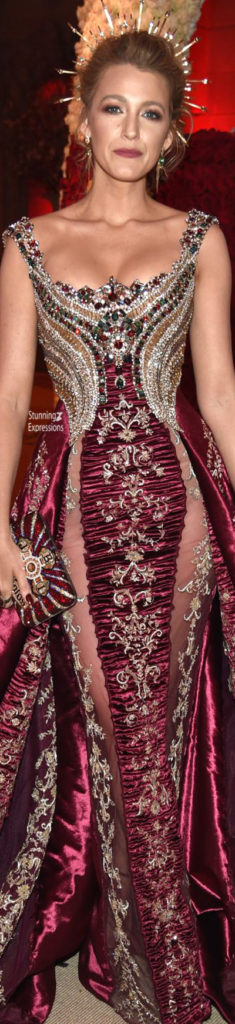
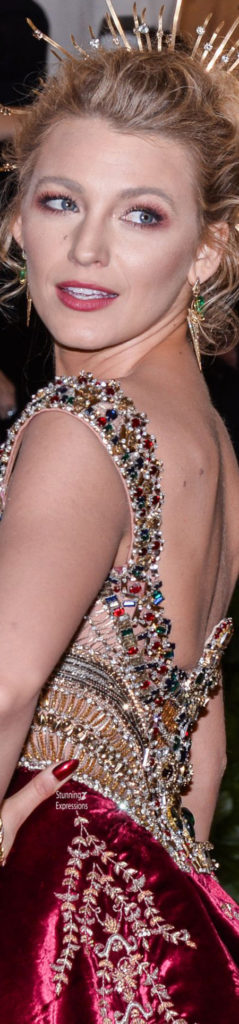
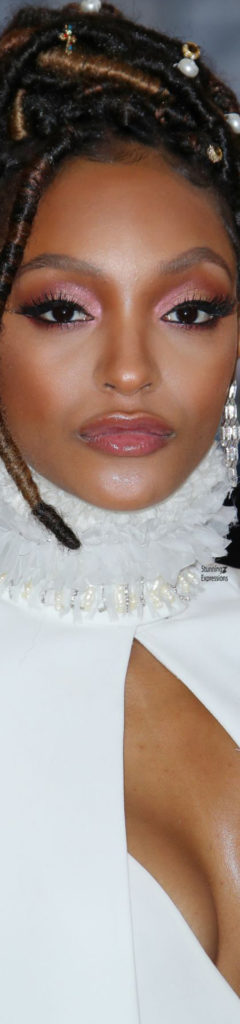
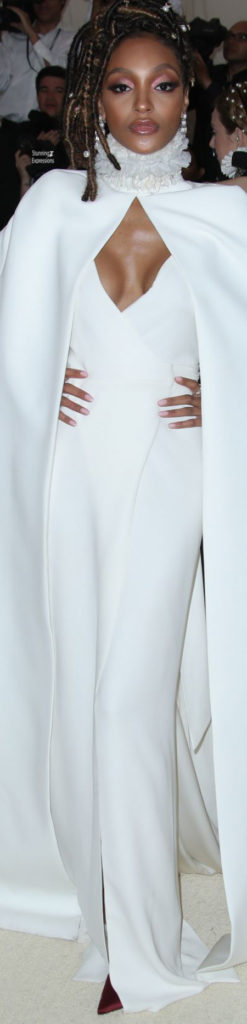
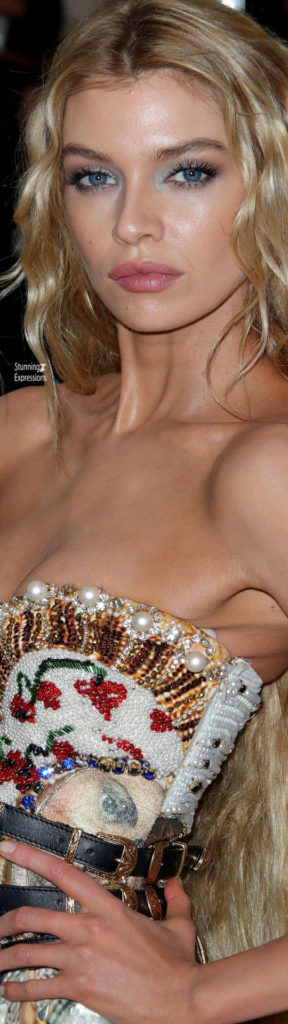
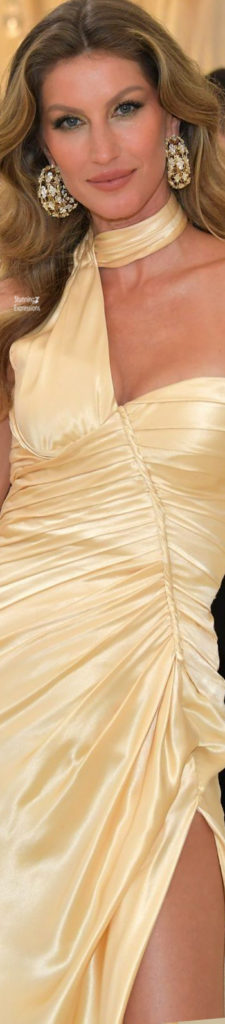
The Met Gala, formally called the Costume Institute Gala and also known as the Met Ball, is an annual fundraising gala for the benefit of the Metropolitan Museum of Art’s Costume Institute in New York City. It marks the grand opening of the Costume Institute’s annual fashion exhibit. Each year’s event celebrates the theme of that year’s Costume Institute exhibition, and the exhibition sets the tone for the formal dress of the night, since guests are expected to choose their fashion to match the theme of the exhibit.
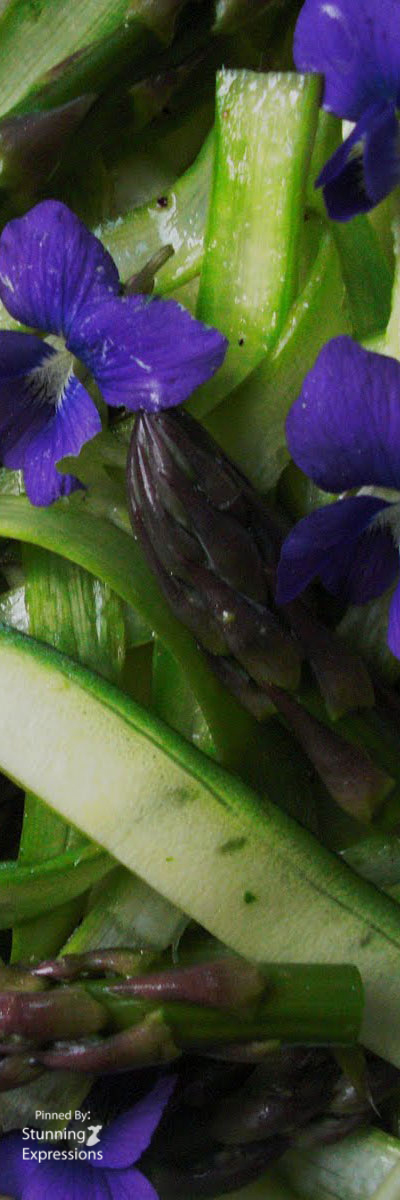
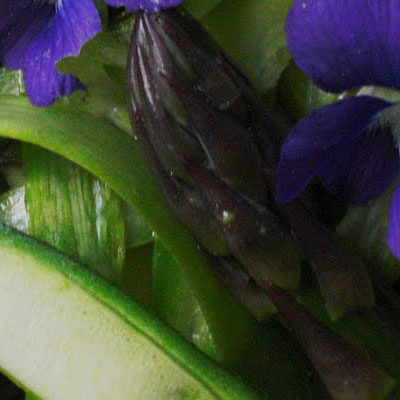
Ribboned Asparagus and Zucchini Salad with Violets
A springtime time salad with vegetables and flowers of the season. Nourish the Roots
1 small bunch of asparagus
1 zucchini
juice of half a lemon
extra virgin olive oil
Fresh Parmesan cheese (not grated or shredded)
freshly ground black pepper
edible violets
Wash the zucchini and asparagus. Trim the pointy tips off the asparagus and set aside.
With a sharp vegetable peeler, peel ribbons of the asparagus and zucchini. Put the ribbons on a large platter. They don’t have to look perfect. This is a rustic salad.
Add the asparagus tips to the ribbons. Drizzle olive oil and lemon juice over the ribbons and toss with your hands. Sprinkle with sea salt and fresh ground pepper and toss again.
Using the vegetable peeler, peel shards of Parmesan cheese over the top. Use as much cheese as you want. The salty wonderfulness of the Parmesan is amazing in this salad.
Top the salad with violets or other edible flowers, if you can find any. If not, I’m sure any type of fresh herb, like basil, would be nice.
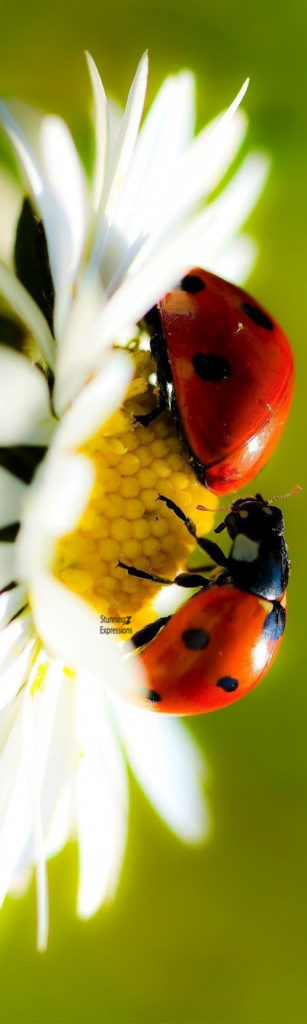
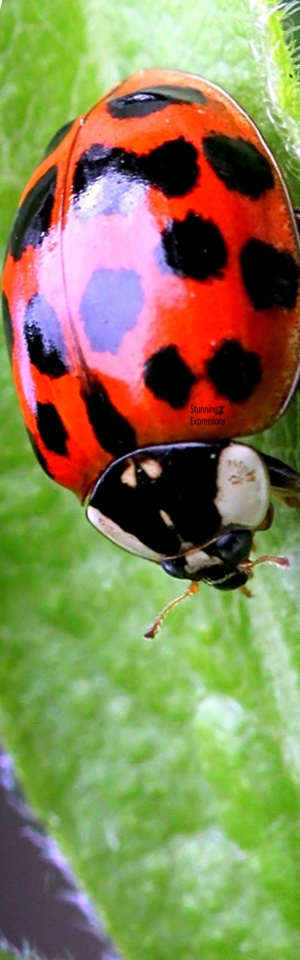
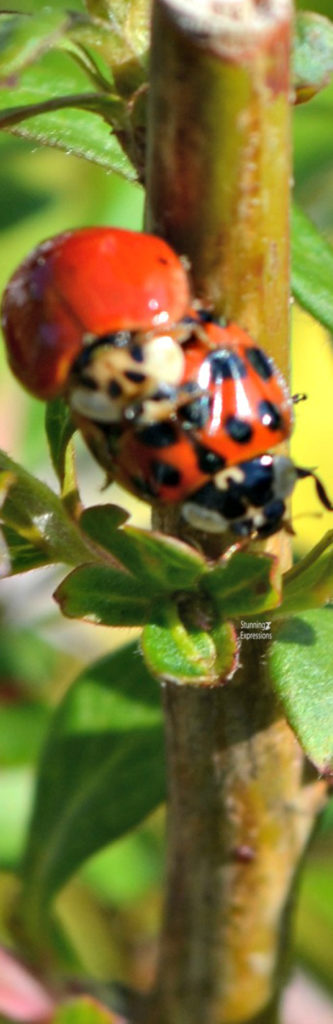
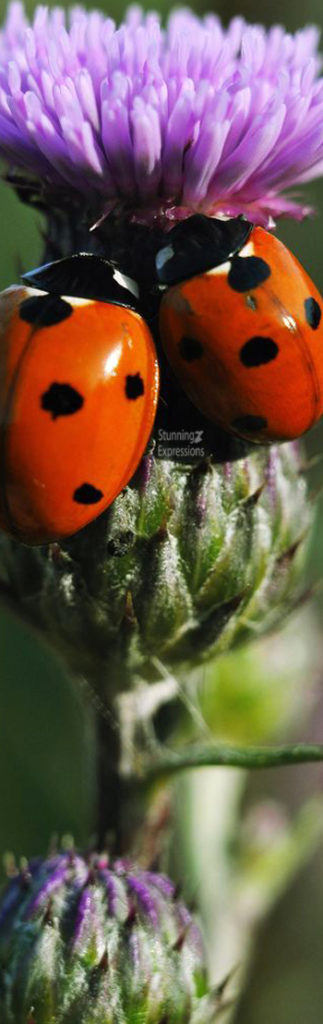
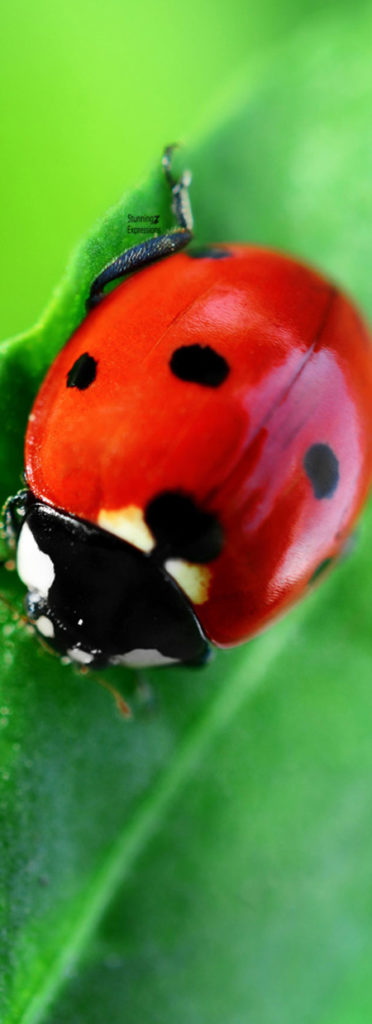
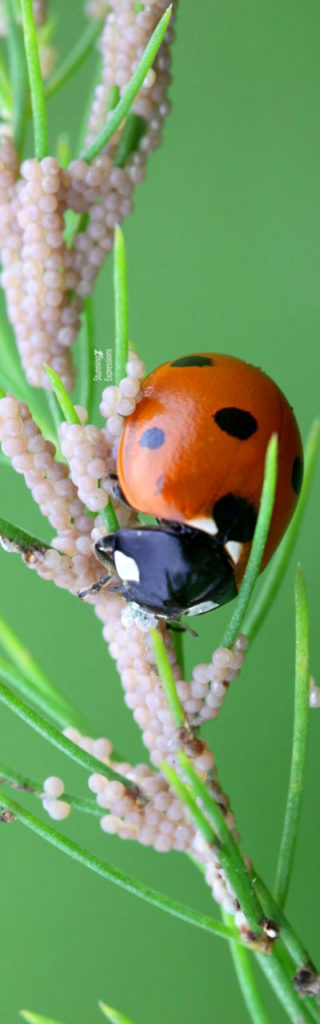
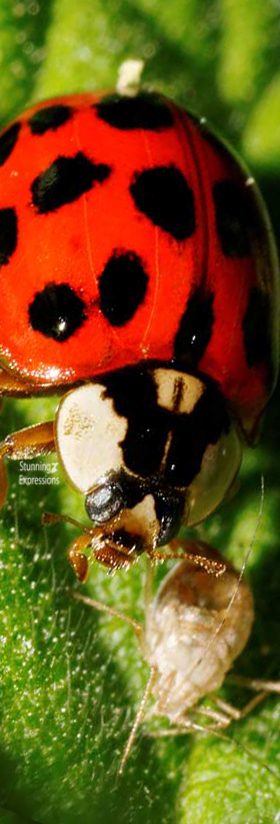
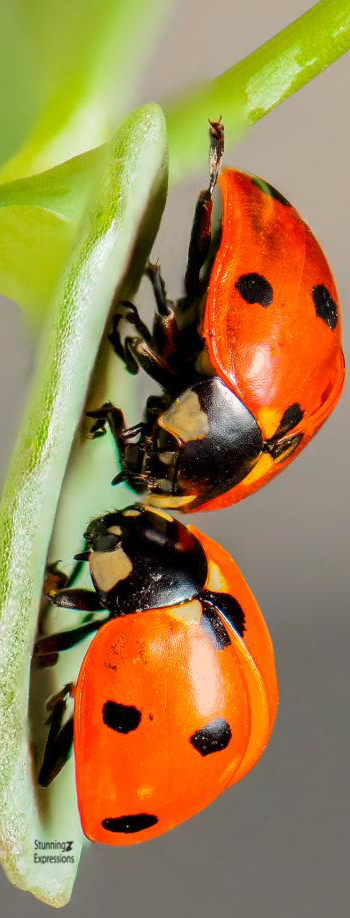
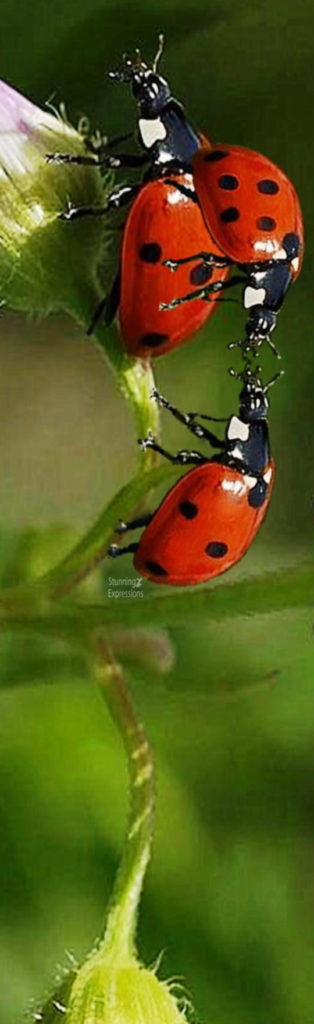
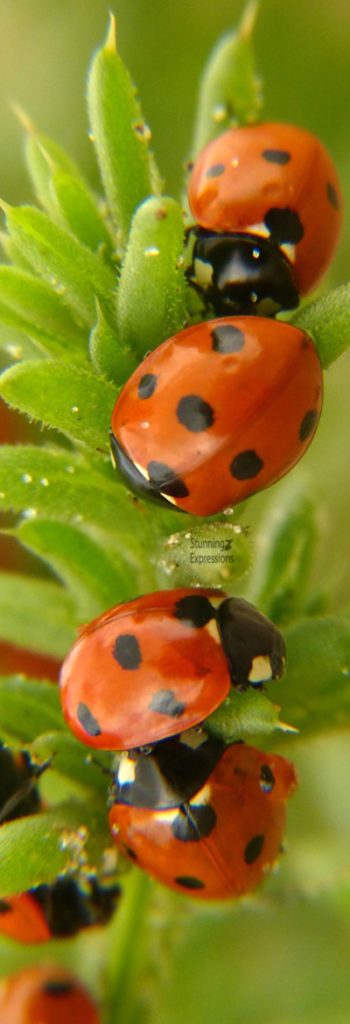
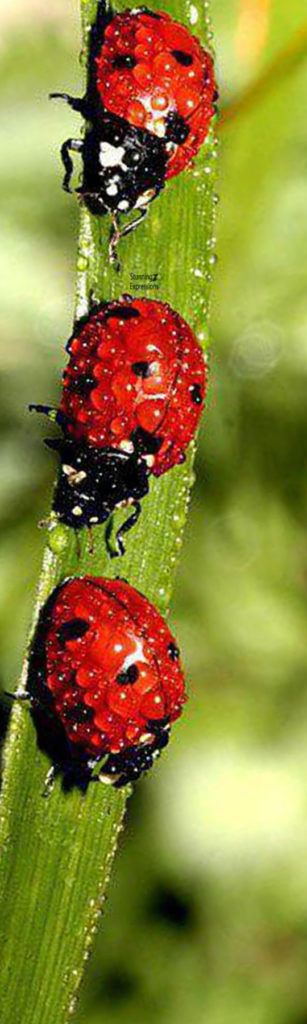
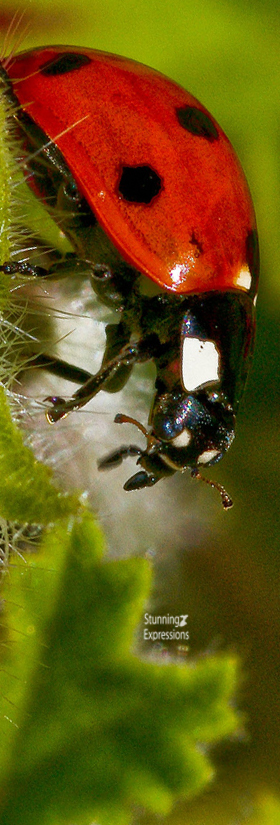
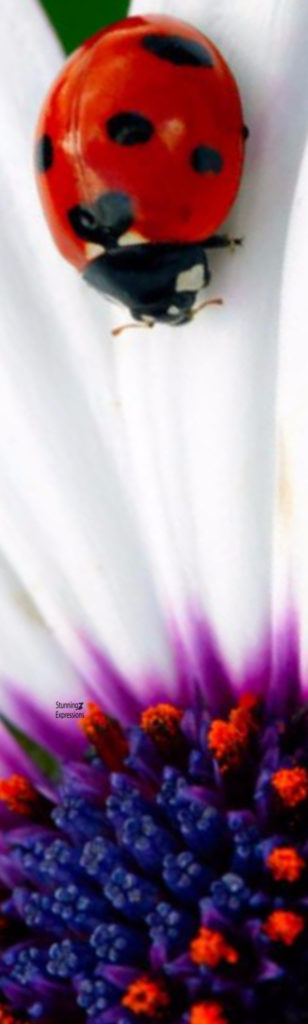
Ladybugs – Coccinellidae is a widespread family of small beetles. They are commonly yellow, orange, or red with small black spots on their wing covers, with black legs, heads and antennae. However such color patterns vary greatly.