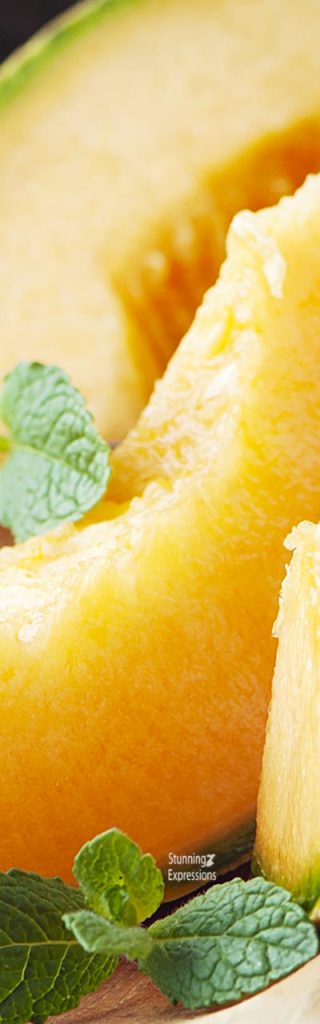
|Love your Melon – Fruit Medley|
Love your Melon - Fruit Medley


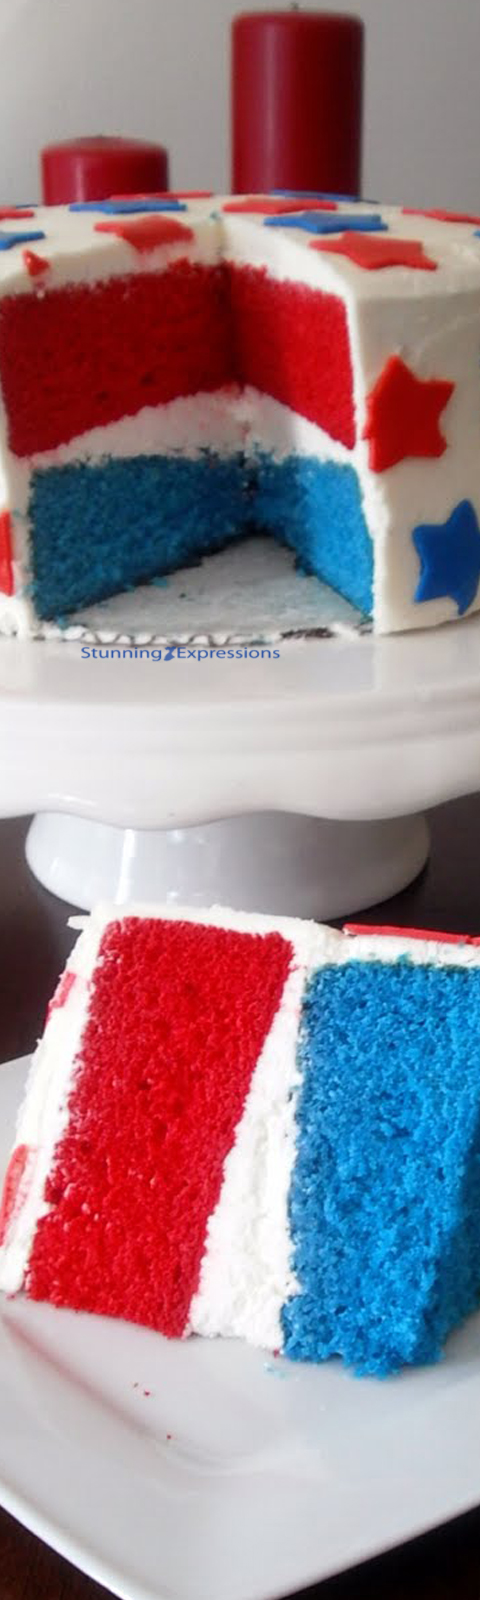

A Patriotic Cake to celebrate 4th of July. La dolcivita
Preheat oven to 350F. Spray with nonstick cooking spray or butter two 8-inch or 9-inch round cake pans. Sprinkle about a tablespoon of all purpose flour into each pan and turn to coat the pan, tapping out any excess; set aside.
In a liquid measuring cup or small bowl, whisk together milk, egg whites, vanilla extract and vanilla bean seeds to combine; set aside.
In the bowl of an electric mixer, sift together flour, sugar, baking powder, and salt. (Or pulse the mixer a few times to combine.) Add butter, a tablespoon at a time, mixing on low until mixture resembles coarse crumbs. (It’ll look a bit like the start of pastry dough.)
Add half the milk mixture and beat until the dough is moist and thick (a bit like cookie dough). Scrape down the sides of the bowl as needed. Add remaining milk mixture and beat until combined. (Mixture should look more like batter now.)
If using food coloring, divide the batter evenly between two bowls. Add enough food coloring to each to achieve the desired color, mixing well to distribute color evenly.
Pour divided batter into prepared cake pans, filling pans about 2/3 to ¾ of the way full. Bake, rotating pans halfway until cake springs back when touched and a toothpick inserted in the center of the cake comes out clean, about 30 to 32 minutes. Cool in cake pans on wire racks until just slightly warm. Turn cakes out of pan and allow to cool completely.
In a bowl set over, but not touching, a pan of simmering water, whisk together egg whites and granulated sugar until well combined. Whisking constantly, heat until sugar is completely dissolved, about 5 minutes, scraping down the sides of the bowl as needed. (To test whether the sugar is melted, rub a bit of the mixture between your fingers. It should feel smooth, not grainy, and be warm to the touch, but not hot.)
Pour the mixture into the bowl of an electric mixer fitted with the whisk attachment and beat on high until the bottom of the bowl is cool to the touch and the whites have formed stiff peaks.
3. Add the butter, a tablespoon at a time, beating until each is well combined before adding the next (about 15 seconds in between). If the mixture looks very soupy after adding the butter, put it in the refrigerator to chill for about 5 to 10 minutes before continuing to beat.
Once the butter has been added, switch to the paddle attachment, and beat on high until light and fluffy, about 5 minutes. (The mixture will probably break and look curdled at one point—don’t worry it’s totally normal. Just keep beating away. It’ll come back together.) Once the buttercream is fluffy, add lemon extract and beat until combined.
Stack the bottom layer of cooled cake on a cardboard cake round (these make it 1000x easier to move the cake, and also protects your cake plate or stand from being scratched up when you’re cutting into the cake later.) Using about a cup to 1 1/2 cups of frosting for the center layer, spread the frosting out from the center of the cake until it hangs over the edges.
Stack the top layer directly on top of the bottom, making sure the cake is even. Spread a very thin layer of frosting across the top and around the edges of the cake. (It doesn’t have to be perfect. This is the crumb coat that seals the cake. It’ll be covered later with the final coat of frosting, so no one will ever see it!) Refrigerate the cake until the frosting is set, about a half an hour to an hour.
Once frosting is set, remove from refrigerator and frost completely with remaining buttercream. After it is completely frosted, it can be left at room temperature. (I put mine back in the fridge because my house was warm and my frosting was looking a bit melty. Just remember to take it out of the fridge about an hour before serving to let it come to room temperature, or the frosting will be hard.)
Makes one 2-layer 8-inch or 9-inch round cake
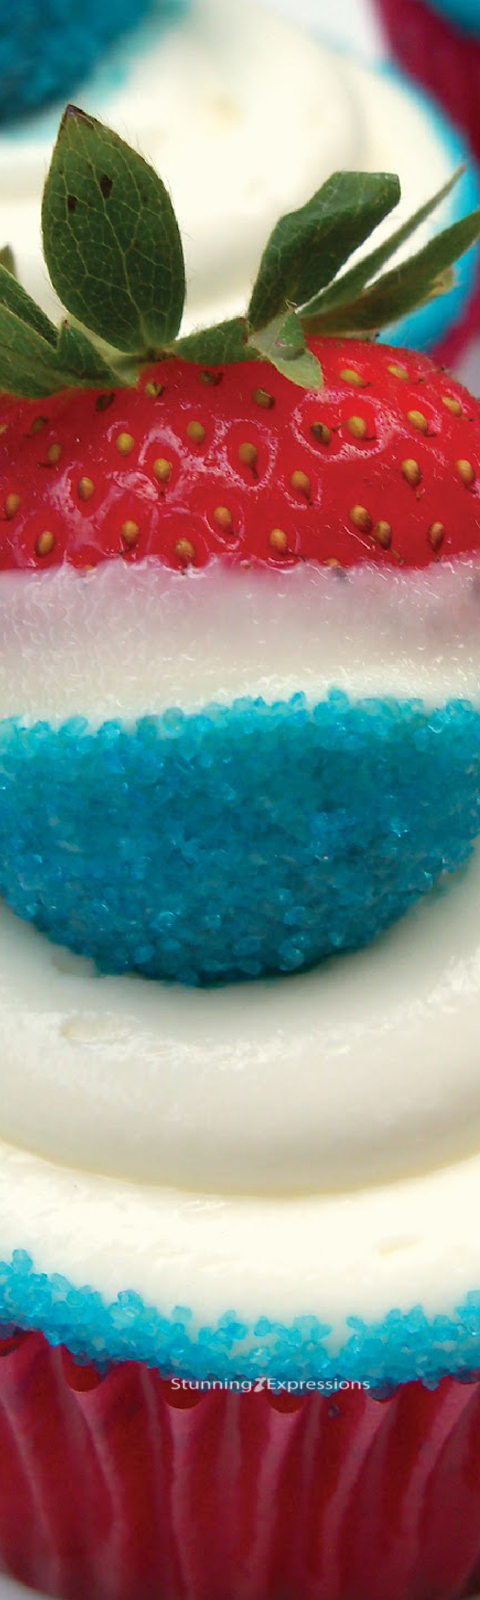
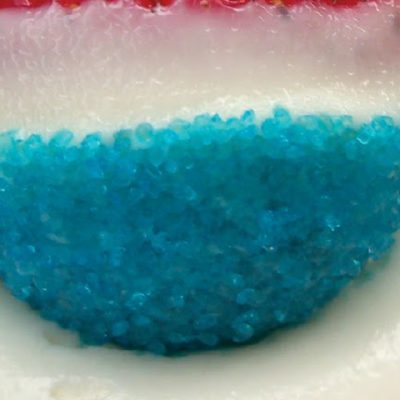
Cream Cheese Frosting and strawberries dipped in white chocolate and blue sugar. a decor for
A 4th of July Patriotic cupcakes.
you start with a cake mix! It will make approx. 30 cupcakes. Bake the cupcakes at 350 degrees for 15-17 minutes. While they cool, make a batch of this frosting:
In a large bowl, beat cream cheese and butter until creamy. Mix in vanilla. Gradually add sugar, beating until smooth. Pipe on cooled cupcakes.
Rinse 30 small strawberries and pat them dry with paper towels. Melt some candy melts or white chocolate chips in a small bowl. Fill another small bowl with blue sanding sugar.
Dip the bottom 2/3 of each strawberry in the white chocolate,then immediately dip the bottom 1/3 in the sugar.Place on wax paper to harden.
Next, cover a small plate with blue sanding sugar.Hold your cupcake sideways and press the edge of the frosting into the sugar.Roll the cupcake, keeping just the edge on the plate.Use a pastry brush to brush off any sugar on the cupcake liner.
When the strawberries have set up, place one on top of each cupcake.
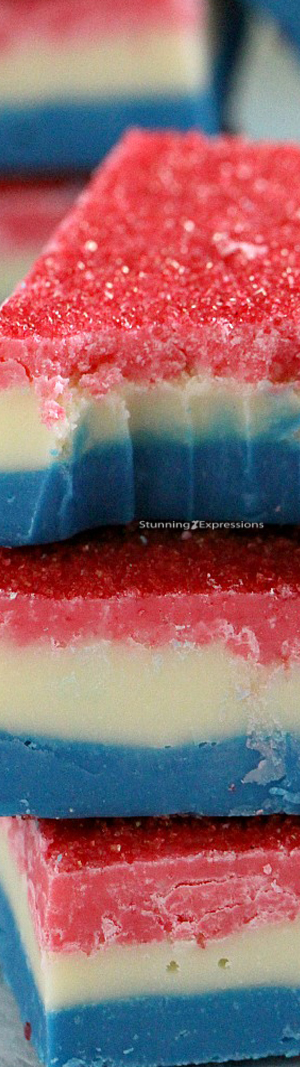

Patriotic Easy Fudge made with only two ingredients, no bake and gluten free. All you need is a microwave and some food coloring for a festive twist. Sweet and Savory Meals
Combine the chocolate and condensed milk in a large, microwave safe bowl. Microwave in 30 seconds increments and stirring after each one until the chocolate has melted. Stir well until smooth, stir in any mix ins and transfer to a 8×8 baking dish lined with parchment paper. When the fudge has cooled off, cut into squares and serve.
Divide the white chocolate chips equally in 3 microwave safe bowls, 1 1/2 cup per bowl. Add the condensed milk, ⅓ to each bowl.
Line a 8×8 baking dish with parchment paper and set aside.
Microwave the first bowl for 30 seconds, stir and microwave for another 30 seconds until the chocolate has melted. Add 8 drops or more of blue gel food color and stir until well combined. Transfer the mixture to the baking dish and level it with a spatula. Refrigerate for 10 minutes.
Microwave the second bowl for 30 seconds, stir and microwave for another 30 seconds until the chocolate has melted. Stir until well combined. Transfer the mixture to the baking dish, on top of the blue layer and level it with a spatula. Refrigerate for 10 minutes.
Microwave the third bowl for 30 seconds, stir and microwave for another 30 seconds until the chocolate has melted. Add 8 drops or more of red gel food color and stir until well combined. Transfer the mixture to the baking dish and level it with a spatula. Top with red sprinkles. Refrigerate for 10 minutes.
Remove fudge from the fridge and let it stand at room temperature. Cut it into squares with a very sharp knife. Serve and Enjoy!
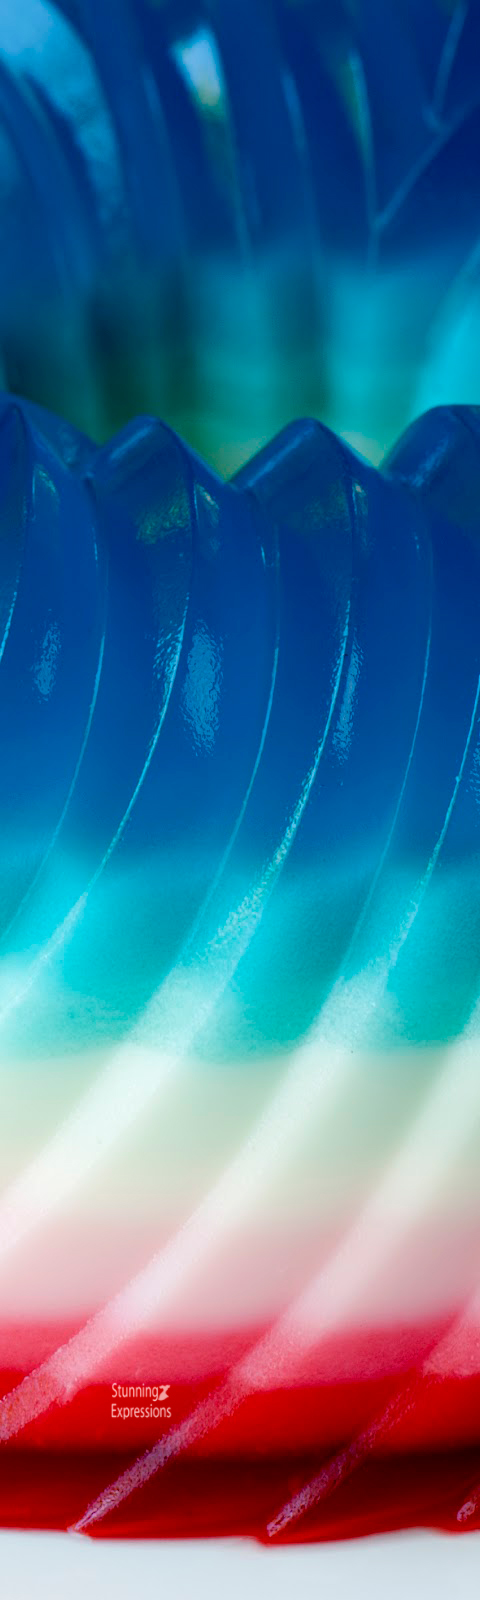

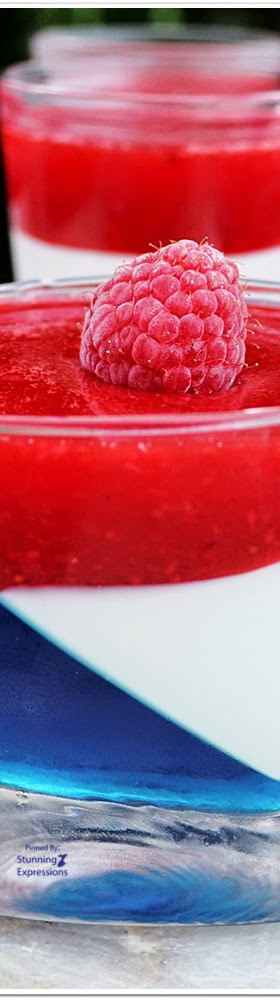
A punch bowl in solid form. And variegated patriotic colors! Fine Dining Lovers
Lightly spray bundt pan or gelatin mold (10 cup volume) with non stick cooking spray. Wipe off the excess spray with a paper towel. A slight residue should remain, just enough to help unmold your gelatin, without affecting the taste or appearance.
Have 9 clean bowls ready to prepare your layers.
Prepare the red and blue layers, in separate pans. Pour the gelatin dessert mix into medium-sized bowls. Pour the water in a small saucepan, and sprinkle each with the envelope of plain gelatin. Allow to soak for a minute or two. Heat over low heat, stirring constantly, until the gelatin is dissolved (about 5 minutes). Pour the warm water/gelatin mixture into the bowls containing the gelatin dessert mix. Stir until dissolved (about 2 minutes each). Remove from heat. Pour in the liquor, and stir well. Set aside and prepare the white gelatin.
For the white gelatin, pour the water into a saucepan and sprinkle with the 6 envelopes of plain gelatin. Allow to soak for a minute or two. Heat over low heat, stirring constantly, until the gelatin is dissolved (about 5 minutes). Stir in the sweetened condensed milk. Remove from heat, and stir in the liquors. Set aside.
Grab the 9 clean bowls, and prepare the layers by mixing gelatin as shown below.
Layer Mixture 1-1 ½ cups blue
2-2/3 cup blue & 1/3 cup white
1/3 blue & 2/3 white
1 cup white & 1 tbsp blue
1 cup white
1 cup white & 1 tbsp red
1/3 cup red & 2/3 cup white
2/3 cup red & 1/3 cup white
Remaining red gelatin
Add the first layer to the prepared mold. refrigerate about 15 minutes or until gelatin is set but not firm (it should stick to finger when touched.) Gently spoon the gelatin for the next layer over the set gelatin, and return the pan to the refrigerator for about 15 minutes. As the layers progress, the setting time will become shorter as the pan and gelatin becomes colder, and the layers become thinner as more are added to the mold.
Repeat steps with remaining gelatin layers, for a total of 9 layers. If you find the gelatin is setting up before its ready to go in the mold, just microwave for 5 to 10 seconds and stir well before adding to the mold.
After completing all the layers, refrigerate the gelatin overnight.
To unmold, fill a larger container or clean sink with warm water (not too hot!). With clean fingers, loosen the gelatin around the edges of the mold cavities. Next, dip the mold almost to the edge into the warm water for just a few seconds (10 seconds worked for me). Dry the bottom of the mold with a towel and check the edges to see if they are loose, if not, repeat the dip for just a few seconds. Place your serving plate on top of the mold and invert.
To make a kid-friendly version, just swap out the booze for flat lemon-lime soda, or even plain water.
These Red White and Blue beauties are a great to celebrate the Patriotic Days.
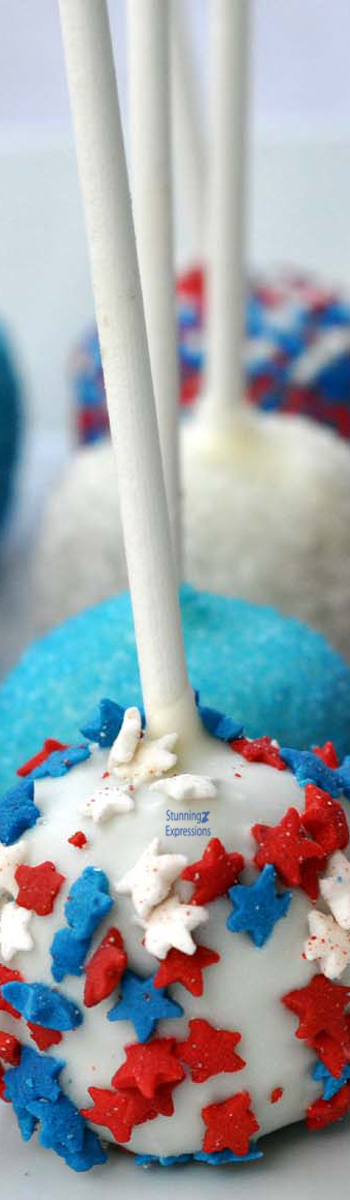
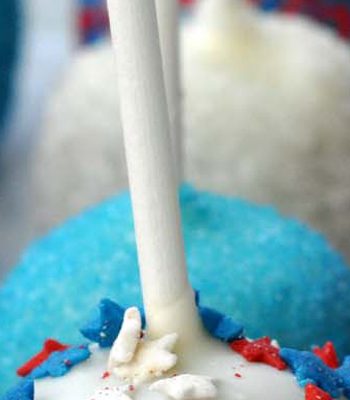
Bake cake as directed on package or in recipe.
When completely cool, break the cake into crumbs by hand in a large bowl. Mix in full can of frosting until well blended.
Roll the cake mixture into 1-inch balls and place on waxed paper.
Melt the candy melts as directed or in a melting pot.
Dip a lollipop stick about ½ inch into the melted chocolate and insert the stick into the rounded part of a cake ball. Repeat for remaining cake balls.
Place the cake pops in the freezer for about 10 minutes, or in the refrigerator for about 20 minutes, to firm.
Once the pops are firm, remove from the fridge/freezer and dip each into the melted chocolate, tapping excess chocolate off.
Use blue red and white candy-making melting chocolate to cover the balls.
Prop up pops, cake end down, on waxed paper while the chocolate is still slightly warm, so the candy hardens into a flat surface at the top (this will help your pops stand up when serving).
Finish the sprinkles before chocolate coating hardens.

Red, White and Blue for 4th of July! Jello could be made like Jello Cake or individual glass cups. Leas Cooking
Mix blue jello with 1 cup of boiled water. Microwave for 30 sec. Mix with 1 cup cold water. Pour in to cups and refrigerate until it sets.
Make white jello. Mix cold milk with gelatin. Let it set for a minute then microwave it for about about 30 sec. It needs to melt. Then to cool it you can add 1 tbsp whipping cream while mixing.
Have sour cream, sweetened condensed milk and whipping cream ready before you cool down the gelatin.
Mix it with the mixer pour gelatin slowly. Then pour white jello in to the cups as fast as possible. Refrigerate until it sets.
Mix red jello with 1 cup of boiling water. Blend strawberries add it to jello. Pour it on the top of white jello. Refrigerate and enjoy!

Marchesa Resort 2020


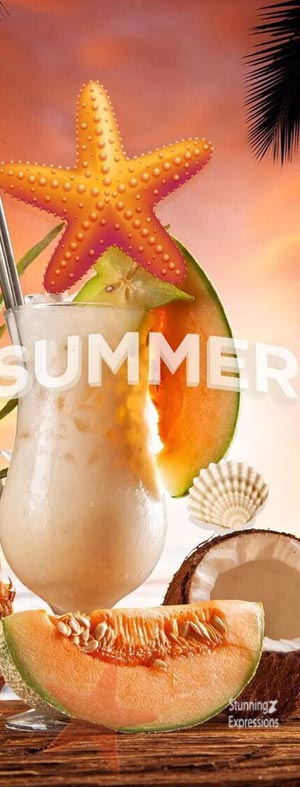
Summertime Colors and Themes


Kate Bock by Lena Melnik for Glamour Hungary June 2019


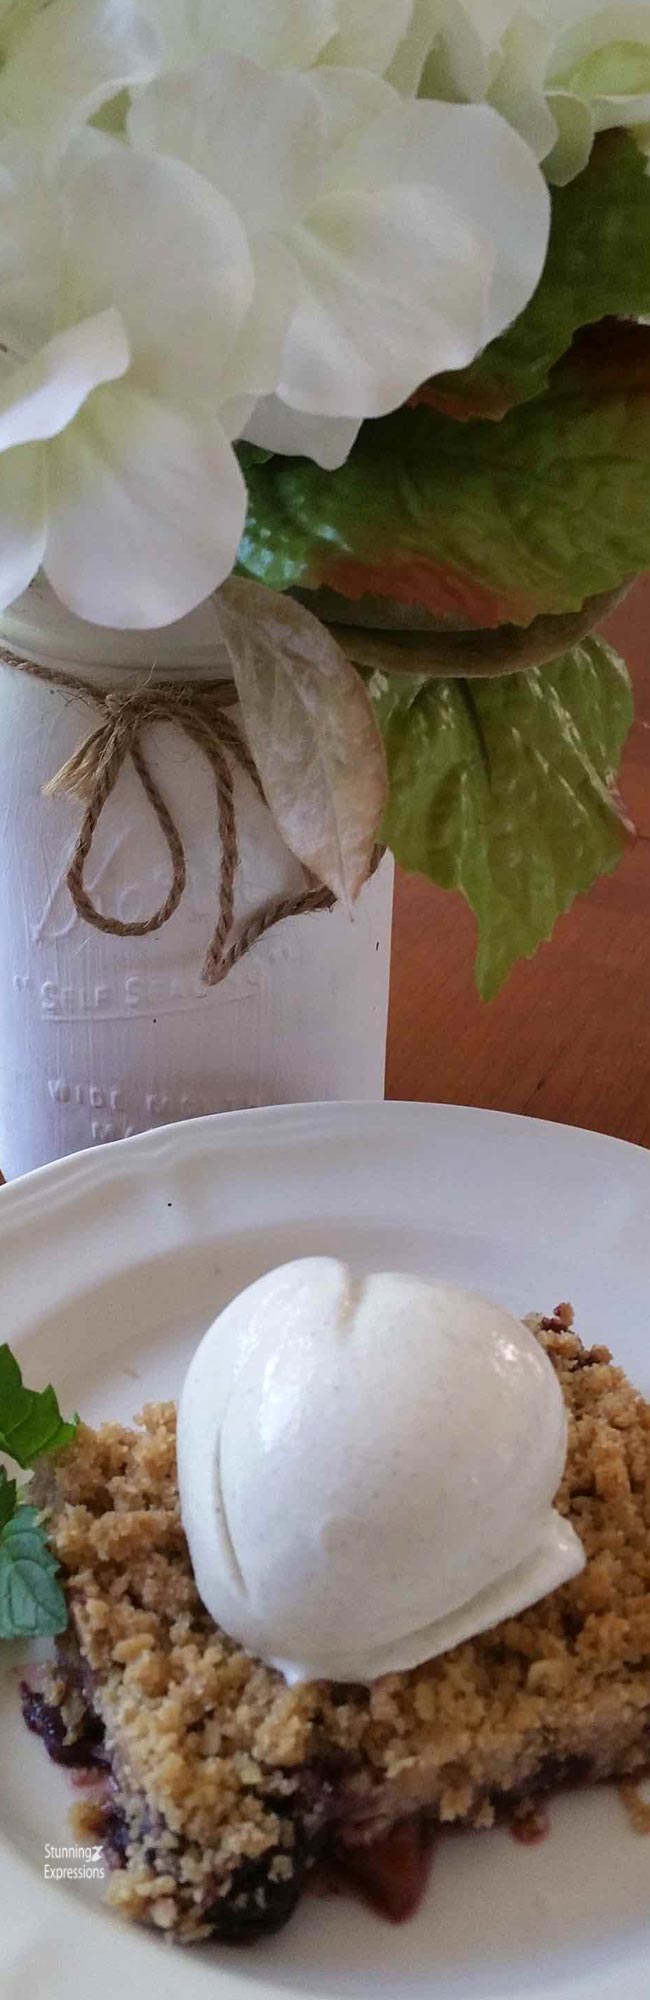
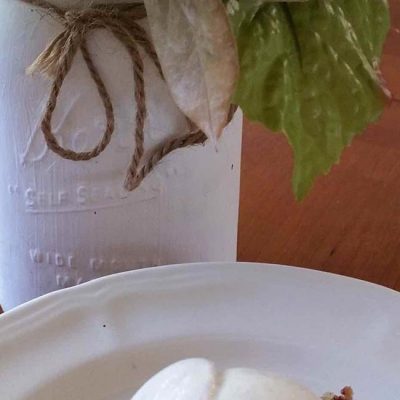
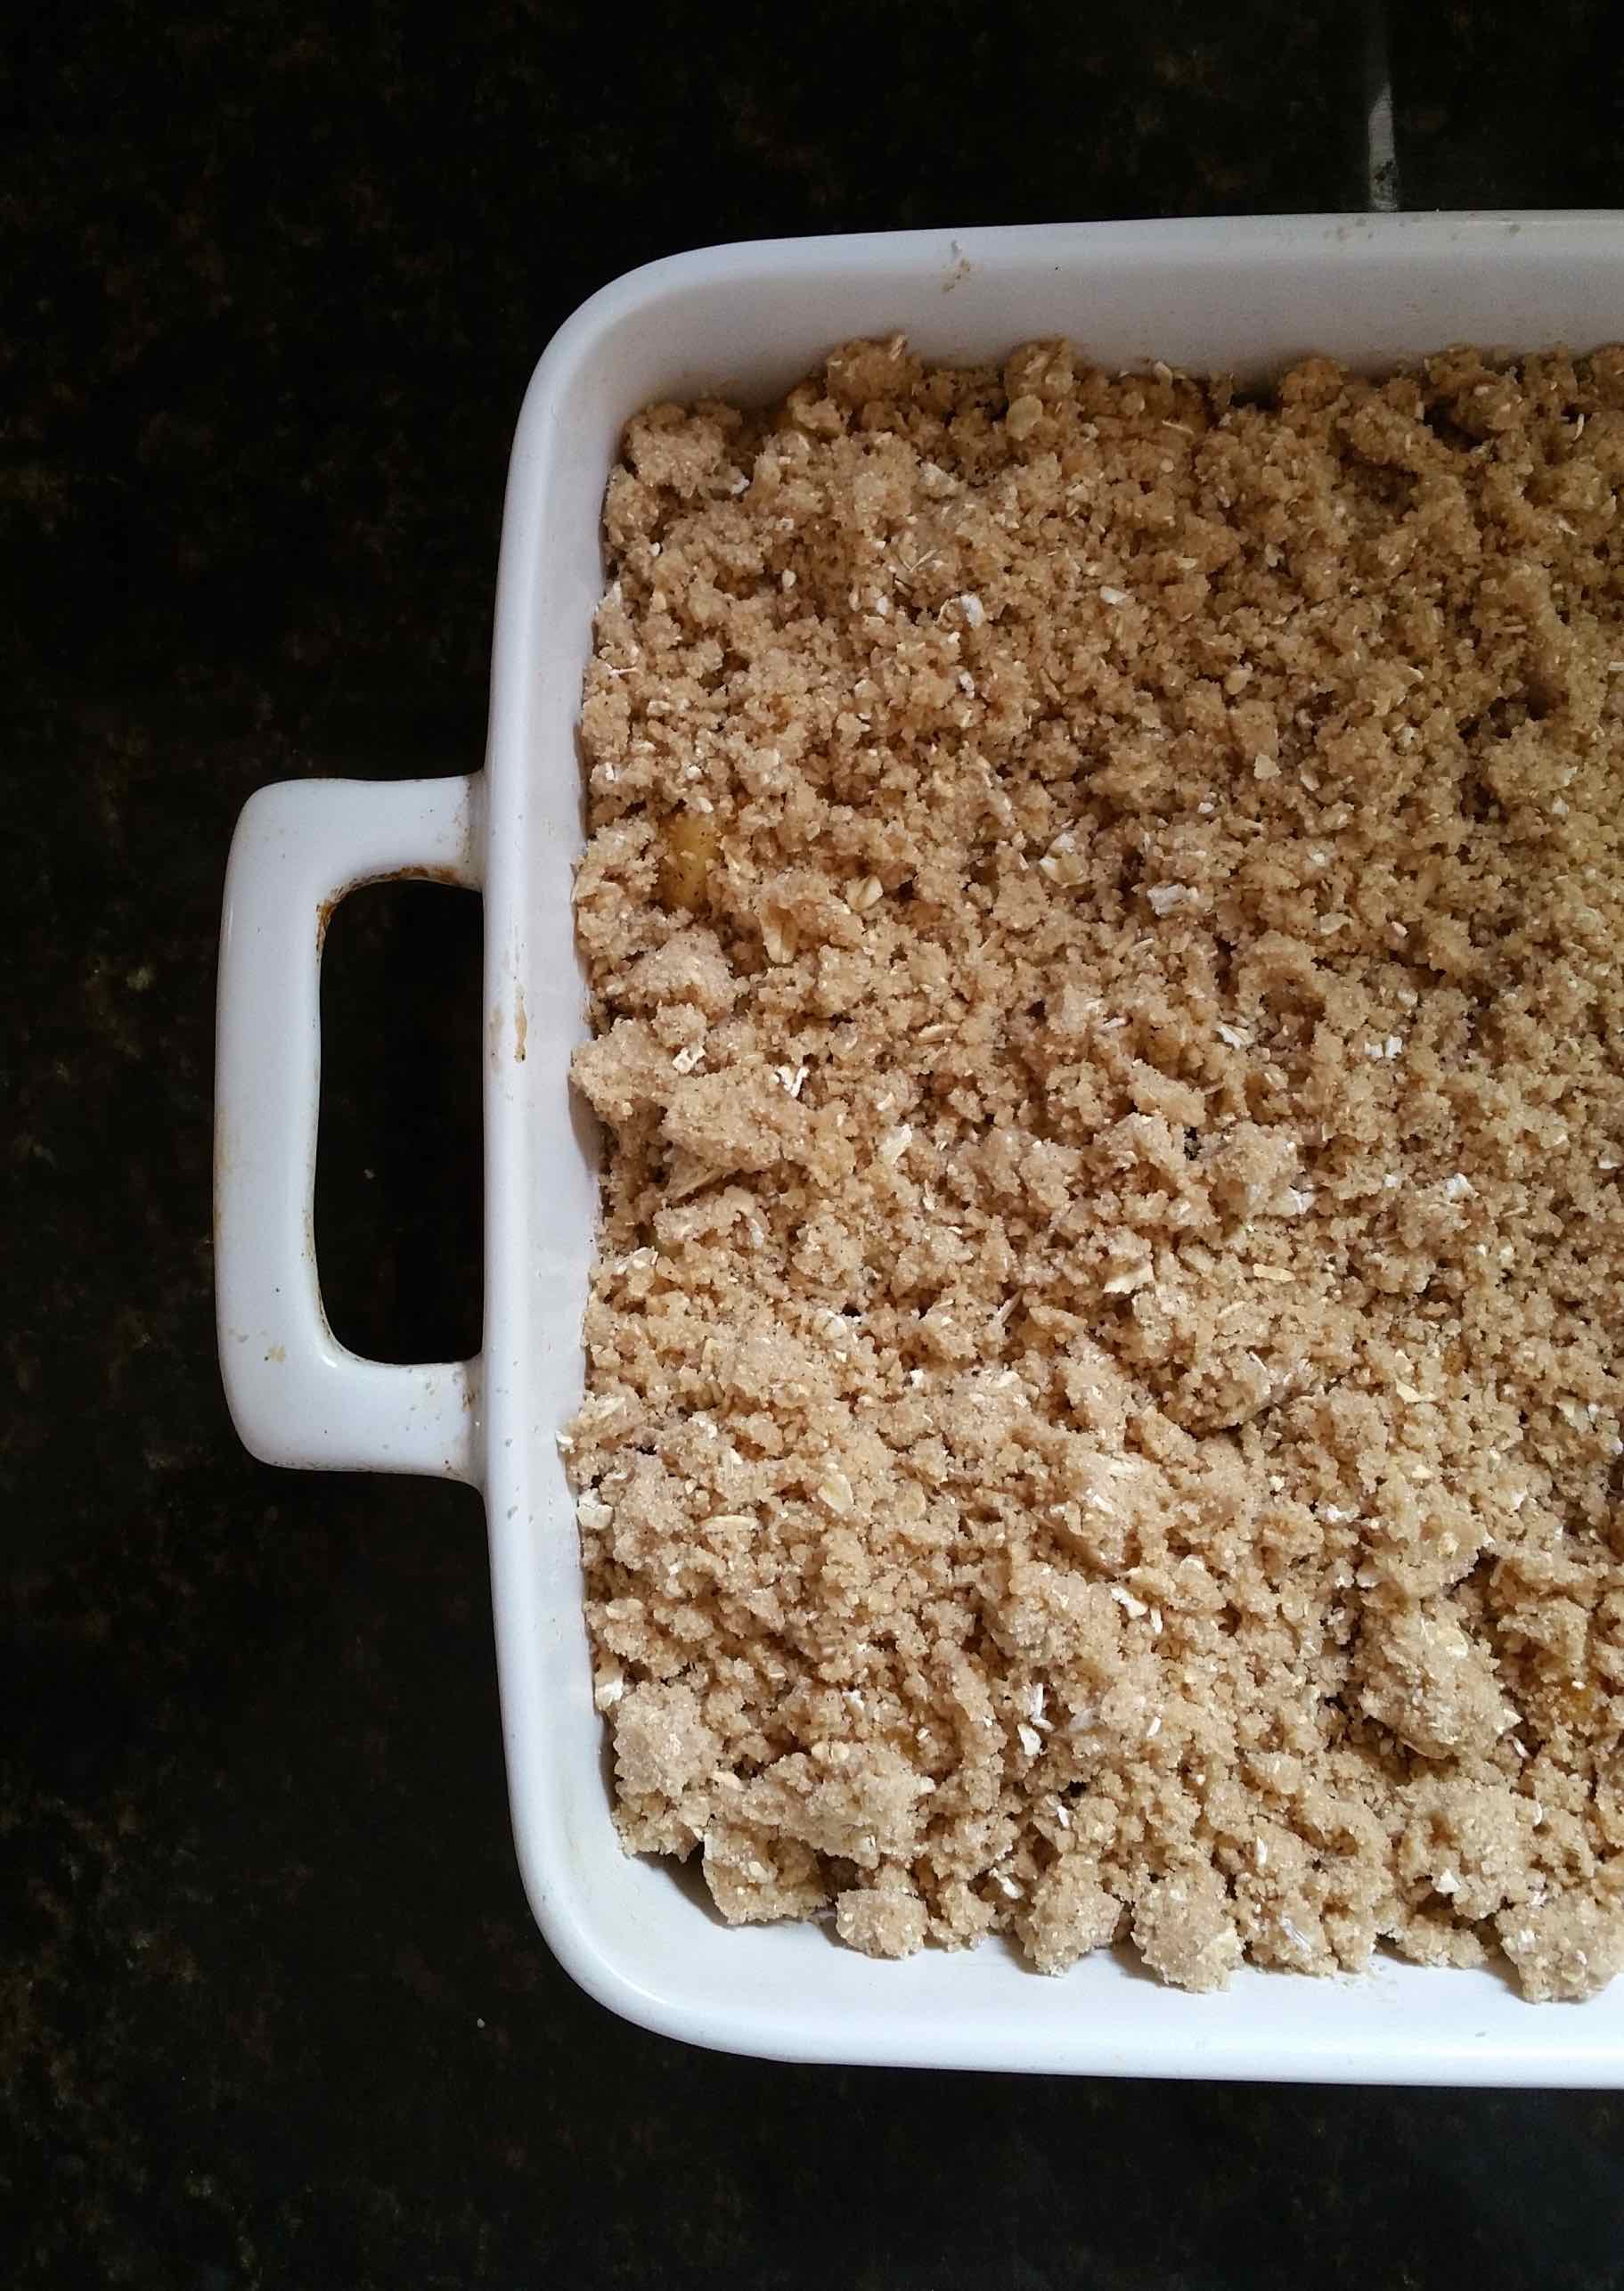
This Apple Blueberry Crisp recipe was submitted to the Del Mar Flavors cookbook by Susan Sbicca. Diane Uke
Mix sugar and spices together; toss with fruit and lemon juice. Put mixture in a 9 x 13-inch baking dish.
You can top the warm Apple Blueberry Crisp with a scoop of vanilla ice cream or whipped cream!

Bibhu Mohapatra Resort 2020


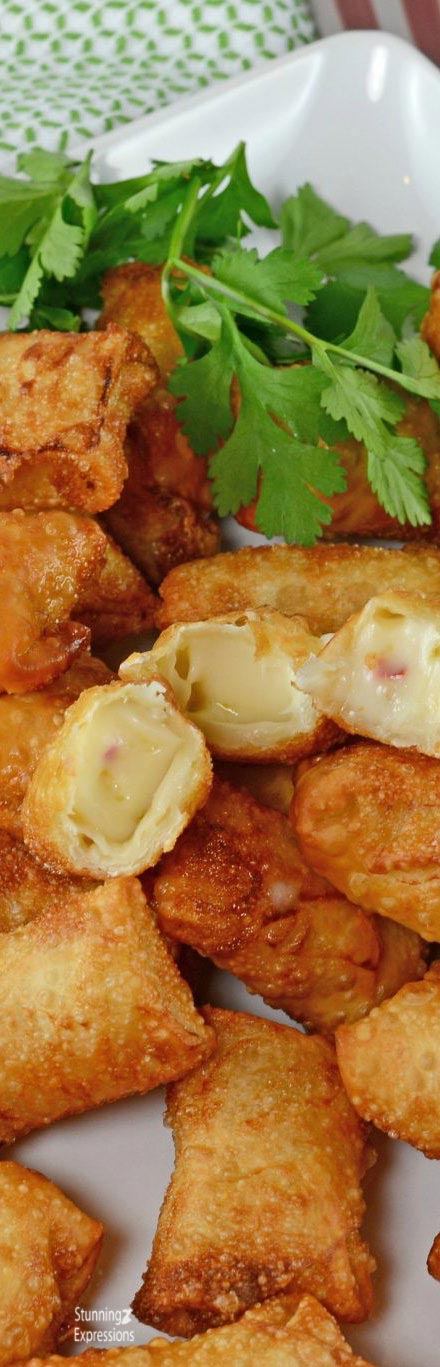

Chile Relleno Bites are a quick hack for making bite sized chile rellenos as an appetizer. Make ahead until you are ready to serve. Savory Experiments
Start by prepping your ingredients. See note for wonton wrappers. Cut brick of cheese into four long strips and then again into one inch bricks. Whisk egg whites and water in a small bowl. Use a cutting board or plate for your work space. Use two medium or one large airtight plastic container for freezing/storing. Cut pieces of wax paper to fit in between layers of chile rellenos to prevent sticking. Your fingers will be all gross, so it is best to prepare these items ahead of time.
You are now ready to start the rolling! I suggest you find something interesting on the tube or radio prior to getting your fingers all mucky. Start by placing one wrapper on your work surface to look like a diamond. Using your fingers, lightly baste egg white mixture over the entire surface. Place one cheese brick in the bottom center. Fold up bottom edge and roll once. Fold in sides to look like an open envelope. Fold over the rest of the way to make a nice, neat little package. Place in your container.
Continue with remaining cheese and wonton wrappers. Avoid having any of the rellenos touch, as they will freeze together and make it difficult to fry later. You might end up with an uneven number. Save the cheese for use in another dish and/or fry the wonton wrappers to make crispy noodles (the ones they give you as an appetizer in Chinese food restaurants).
Cover your container and place in the freezer for a minimum of one hour. I've kept these in the freezer in an airtight container for two months or more.
When you are ready to prepare your rellenos, heat 1 inch of vegetable oil in a heavy medium sauce pan over medium-high heat. Different ranges take varying amounts of time to heat. If you sprinkle a dab of water into the hot oil and it sizzles and spits- it is ready. (Be careful doing this…)
Using a fry spoon (see picture), add 5-8 (depending on pan size) chile rellenos to hot oil. Flipping once or twice, cook rellenos until they are golden brown and crispy. The way I know they are cooked is when the first relleno starts to leak cheese. The sound of the oil will change dramatically when this happens. Then I know it is time to remove them all before they are void of any cheese. This takes approximately 3-4 minutes and will decrease in time as you fry because your oil will get progressively hotter.
Remove rellenos with your fry spoon to a paper towel lined plate or baking sheet. If you are making a large batch, heat your oven to the lowest possible temperature to keep warm while frying, but not too hot to have a cheese explosion. Again, the goal is to keep the cheese inside the wrapper!
Serve immediately with salsa, sour cream or guacamole.
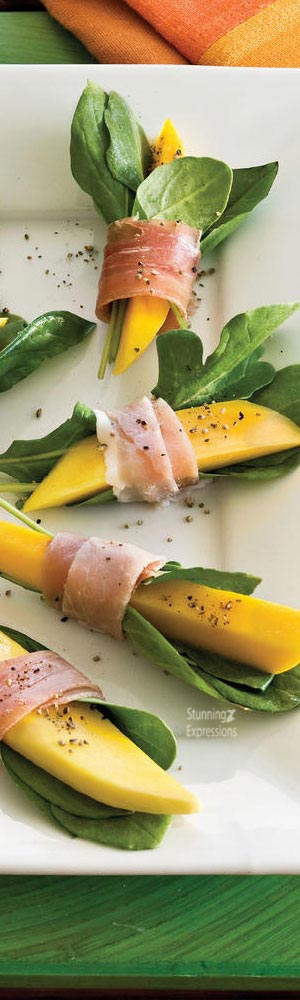
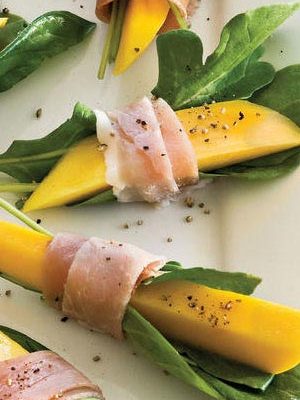
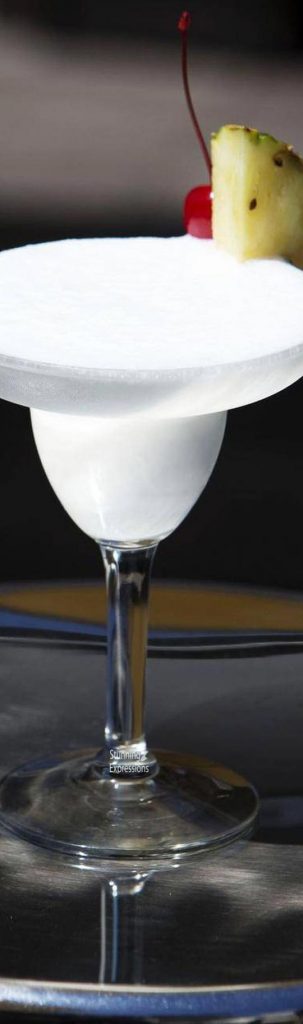
Summertime Appetizer – My Recipes
Cut mango into 1/4- to 1/2-inch slices (about 16). Place 1 mango slice on top of 3 arugula leaves and 1 to 2 basil leaves.
Cut each prosciutto slice lengthwise into 4 strips. Wrap center of each mango bundle with 1 prosciutto strip. Arrange on a serving platter, and sprinkle with pepper.
To make ahead, prepare recipe as directed. Cover bites with damp paper towels, and chill 30 minutes.
Ask for paper-thin slices of meat at the deli counter. To ease prep, look for a package of presliced mango in the produce section. We do not recommend jarred mango slices—they’re too soft.

Elie Saab Resort 2020


