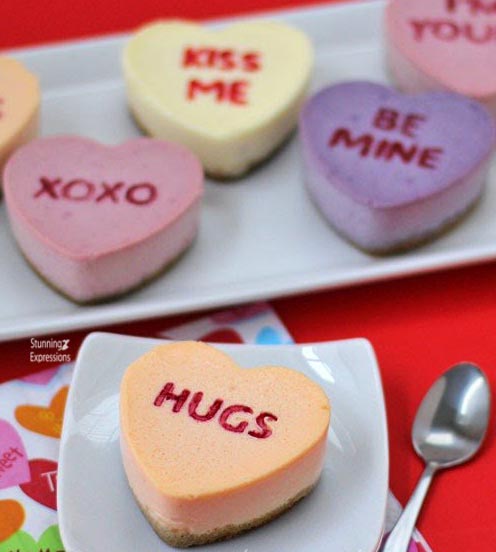
Conversation Heart Cheesecakes

A sweet Valentine’s Day dessert. This Valentine’s Day tell your sweethearts how you feel by adding personalized messages to brightly colored, rich and creamy, Conversation Heart Cheesecakes. Hungry Happenings
Crust
- 1 cup graham cracker crumbs 15 squares
- 1 pinch of cinnamon
- 4 tbsp 1/2 stick butter, melted
Cheesecake
- 16 ounces 2 blocks cream cheese, softened
- 1 cup sugar
- 3 large eggs
- 1 pint 16 ounces sour cream
- 1 teaspoon vanilla extract
- food coloring – pink purple, blue, green, yellow, and red
-
1-Fill a roasting pan with enough water to come half way up the sides of the silicone heart molds.
2-Set pan in oven.
3-Heat oven to 325 degree Fahrenheit.
4-Mix together the graham cracker crumbs, cinnamon, and melted butter.
5-Equally divide the crumbs among 18 heart shaped silicone mold cavities.
6-Press the crumbs into an even layer and refrigerate until needed.
7-Beat cream cheese until creamy and smooth.
8-Add sugar and beat until incorporated.
9-Beat in eggs then add sour cream and vanilla and mix just to combine.
10-Equally divide batter into 6 bowls.
11-Color one bowl of filling pink,another lavender, yellow, orange, green, and blue using food coloring.
12-Equally divide each color of filling among 3 heart cavities.
13-Bake cheesecakes in a water bath for 18-24 minutes until the edges look set but the center is jiggly but not wet.
14-Remove from oven and water bath and allow to cool at room temperature for an hour.
15-Freeze for at least two hours then remove and un-mold.
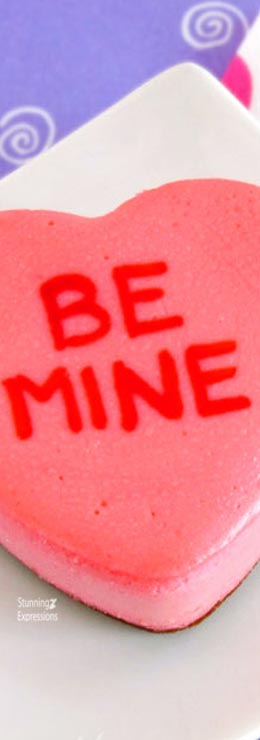
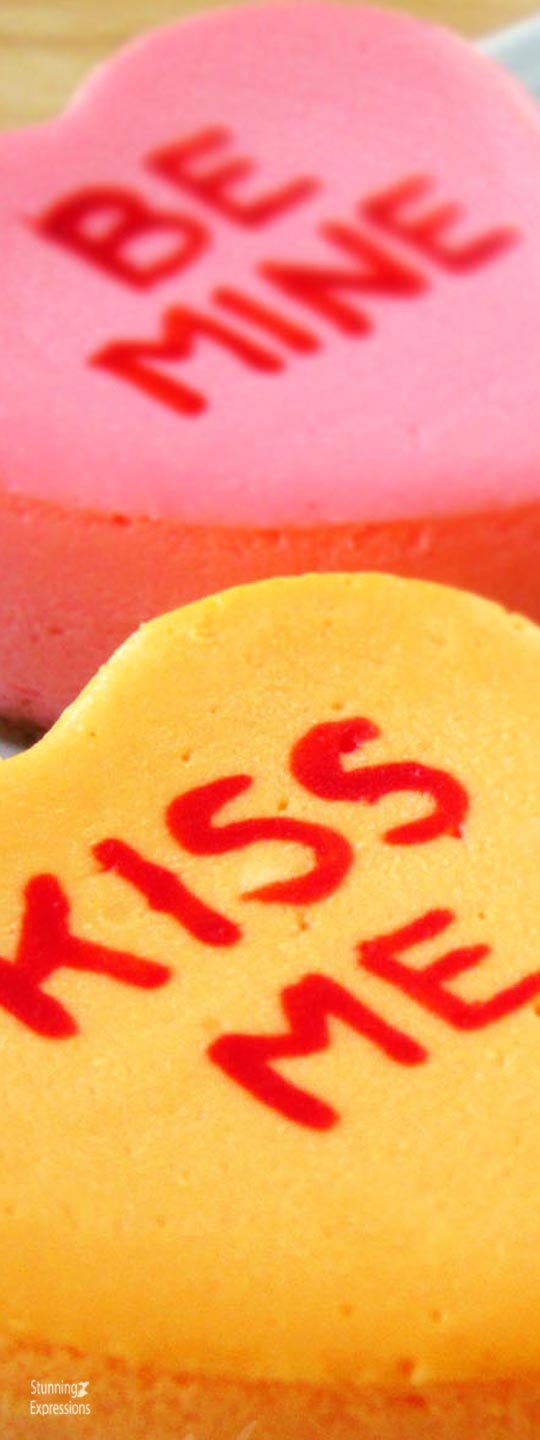
16-Paint conversation heart phrases onto the tops of the cheesecakes using red food coloring.

Supplies Needed:
stand mixer or a mixing bowl and hand held mixer
rubber spatula
3 Wilton Heart Shaped Silicone Molds
fine tip paint brush (new or food only brush)
roasting pan big enough to fit your heart shaped molds.
You will need a water bath to bake your cheesecakes, so either place your roasting pan in the oven filled with enough water to go half way up the sides of your heart molds and allow the water to heat along with the oven or bring some water to a boil in a tea pot or the microwave then pour it in the bottom of the pan.
My roasting pan has a flat rack that fits inside. I set two heart molds on the rack, filled them, then used the handles to help me lower the molds into the hot water.
After the cheesecakes bake it’s so easy to lift them out and cool on the rack.
Use a roasting pan with a removable rack to make it easier to remove cheesecakes.
You can set your heart molds in your roasting pan, then carefully pour boiling water around the heart molds.
If baking tiny cheesecakes, bake for 10-14 minutes.
If you bake one large heart shaped cheesecake, it should take between 42-50 minutes.
Remove from freezer, uncover, then push on the underside of each heart mold, releasing the cheesecakes.
Carefully lift them out of the mold. If they don’t pop right out, you need to freeze them longer.
To add the conversation heart phrases, squeeze a few drops of red food coloring into a small bowl. Use a fine tip paintbrush to paint the words onto each cheesecake heart.